Thursday, June 3, 2010

c.r.e.a.t.e.

To create this fun wall hanging, I used a "page" from Maya Road's Wavy Layer Chipboard Book. I painted the front and back a creamy white color then sponged the edges with permanent brown ink. I hand cut a piece of Basic Grey patterned paper from their Porcelain line, sponged the edges with chocolate ink, machine stitched around the edges and adhered with Tombow's Mono Adhesive Power Bond.


I used Tombow's Mono Aqua Liquid Glue to adhere brown glitter to Maya Road's David Chipboard Alphabet. I used the Mono Aqua Liquid Glue to adhere the letters to the wallhanging.

The bird and leaf is punched from one of Stampin' Up's punches.
The flower is made by stamping several scallop circles, wadding them up in a ball
and then flattening them back out.
I made two holes with my piercer and threaded the vintage button with crochet thread for strength and knotted to the back.

I then spritzed the flower very lightly with water and one layer at a time started scrunching the flower up around the button. After the flower was completely dry, I brushed the edges with brown ink and ahdered the flower with the liquid glue.
I added a ribbon hanger with Maya Road's Pink Sophisticate Striped Ribbon.

Be sure to comment all week on the Tombow blog for prizes.

Wednesday, June 2, 2010

Missing U

This month Tombow is featuring their wonderful Dual Brush Tip markers. I colored Maya Road's chipboard letters with four of the markers (see supply list for colors I used) using the brush tip end. Then for the inside of the card I hand wrote "missing" with the pen tip end.

Tombow's Mono Multi Liquid Glue is perfect for adhered the jewel flowers (also Maya Road) as well as the letters to my card.

 supplies: Tombow Mono Multi Liquid Glue, Dual Brush Pens #873 (peach), #743 (pink), #452 (turquoise), #192 (green); Maya Road Clear Jewel Flowers, David Chipboard Alphabet; Making Memories Paperie Poolside patterned paper, EKSuccess scallop punch

Be sure to stop by the Tombow blog and comment to be entered to win a prize. Ü

Pantry Challenge Day 2

Good Morning! For today's pantry challenge, we will be eating:
lunch: tortilla roll-ups (sundried tomato tortillas with sourcream, salsa, leftover grilled chicken and lettuce, roll up and cut in half), carrot sticks, potato chips and for dessert we will share a LARGE blueberry muffin from Perkins (couldn't eat it yesterday and it came with my meal)

supper: grilled hamburgers, baked beans, veggies, pear cobbler

Tuesday, June 1, 2010

June Pantry Challenge

In January, I followed some others in a pantry challenge. The challenge was to eat as much as possible just from what is in your pantry/freezer and buy as little as possible. I knew I wanted to try it again this summer, so I've decided that June is that month. My goal is to only buy items that are dairy, fresh fruit and veggies and staples, like flour, sugar etc.

I will keep you all updated with our meals and share recipes when I can and also how much I spend on groceries for the month of June. If you would like to join me, please let me know and keep me updated on how you are doing.

The boys are in TX this week working at a camp getting it ready for campers. Meals have been light since they left early Saturday morning.

Today I ate out with mom (she paid) for lunch and I'm not sure what Bruce ate, but probably leftovers or cereal.

For supper I made grilled chicken which had been marinated in lite Catalina dressing, lettuce salad with tomato and shredded cheese and garlic bread made with homemade bread.

I hope to get back to stamping this week. I had big plans and they've all changed for what my week looks like.

Wednesday, May 26, 2010

Cherry Coke Gift Box

YAY! School is officially over! I am so ready to start summer vacation. I am having a garage sale this weekend (please come over if you live in the area), so will be getting ready for that and then hope to start doing some creating Monday. The boys are headed to TX early Saturday morning, so I'll have lots of time on my hands. Ü

This week Tombow is partnering with Graphic 45. Be sure to visit both the Tombow blog and the Graphic 45 one for chances to win product. There are some super fun ideas on both blogs too!

Do you ever make anything and love it so much you have a hard time giving it away? This is one such project. I had so much fun making this. The idea actually started out as a baby basket using this paper, but didn’t have any baby items to fill the box AND I didn’t know anyone expecting. LOL!
Then I remembered this fun paper I had received from Graphic 45 with the cherry drink on it (paper with the circles) and thought it would be fun to make a Cherry Coke themed box for a friend or graduate. (aqua), (cream scallops), (polka dots), (swirls), and (circle cherry drink paper).

Okay, let’s get started with all I did to make this fun box as there are a lot of details. I’m going to break up the details in numbers to make it easier to read. (I hope Ü)


1. The box. This is a 2-drink carrier from McDonald’s. (seriously!) We went to McDonald’s drive thru asked for 2 waters (we did order their 3 chocolate chip cookies for a dollar…okay getting off the subject here) in the 2-drink carrier. As soon as we pulled away, I had my son get the cups of water out of the carrier and put it in the back so I could use it later. I brushed all the edges of the box with tan ink.

2. I traced the sides onto scrap cardstock to make my patterns to cover the box. After I had decided on my theme, I went through the papers (and there were a LOT of them…Thank you Graphic 45!) that I had received and chose 5 coordinating papers.
3. I cut my pieces as I wanted them on the box and stitched around each piece (except for the scallop edge) and took a tan ink pad and brushed each piece WITH the ink pad to grunge it up. I went with the grunge look as the Cherry Drink paper has a vintage image on it.


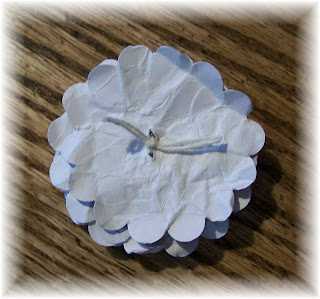
4. For the scallop edge, I used my new favorite EK Success punch.


5. I adhered all the pieces with Tombow’s Mono Adhesive Power Bond.

6. Several elements of this box is inspired are inspired by my friend Michelle Wooderson (you SERIOUSLY have to check out her blog if you aren’t familiar with her work!) First element is using old pattern tissue for tissue paper. I found some old patterns at a shop for 5 cents each. Pretty inexpensive tissue paper! On one side of the carrier is a bottle of Coke and a Twin Bing candy.

The candy has a cherry nougat center. This candy is only found in a few states. It has a nutty chocolate outside. Very yummy!

7. On the other side of the carrier is this cup that I found at a local store for $1. How cool is this???!

The colors match my paper perfectly. I was looking all over for a Coke glass and found this AFTER my box was made. I was tickled pink…I know, doesn’t take much for this farm girl to get excited. I included a cello bag of chocolate covered cherries (if I would have had the time I would have made homemade candy, like Black Forest Fudge)


8. Another inspired item on the second side is a recipe card. Mish decorates her recipe cards so cool. I can just imagine how cool her recipe book looks! You can buy Cherry Coke, but I thought I’d Google a recipe for making your own and found this simple recipe and what fun that it uses cherry Kool-Aid…another decorating element I can use for my gift box. (hey did you know that Kool-Aid got it’s start in Hastings, Nebraska? I live some place famous. Ü You can read about it here.)  

I stamped on the recipe with Stampin' Up's Canvas (retired) stamp to give it a grungy look. I punched a scallop circle in aqua and hand cut a circle (dots) and taped it to the recipe card. (oh yeah, you can use this recipe for Sprite too. kids used to order cherry Sprites when I worked at Dairy Queen.

9. I couldn’t figure out how to decorate the front and it finally came to me to use the Kool-Aid packet somehow. Mish came up with a pocket card a few years back and recently has been making paper bag ones. BINGO! I have a BUNCH of “smaller than lunch bags” sized sacks and knew they would be the perfect size.

10. I folded the bag into a “pocket” shape and machine stitched the sides, then brushed edges with ink and inserted the cherry Kool-Aid. I used buttons to represent cherries and drew a stem. I hand cut a leaf from felt and sewed down the center.


11. To hold the pocket to the box, I used a clothespin (yet another Mish idea…I told ya she was creative!). I cut paper to fit both sides of the clothespin and distressed with ink. Using crochet thread, I knotted two Basic Grey buttons and glued to clothespin with Mono Aqua Liquid Glue and WA-LA ~ a lovely gift basket to give.

Wednesday, May 19, 2010

Congrats Graduate!


We are done with graduation here (May 8th) and had our first son graduate. I had lots of graduation cards to make for his friends and this is one of them. I used more paper from Cosmo Cricket's The Boyfriend line and chipboard letter "g" from Maya Road to create this card. I'm going to be sad when I'm out of this wonderful paper!


I cut the star with my George Cricut cartridge. I cut 4 from scrap cardstock and one from the patterned paper from Cosmo's Early Bird line. I hand wrote "congrats graduate!" with the fine point tip of Tombow's black Dual Brush Pen.

Supplies:
supplies: Tombow's Dual Brush Pens #856 & N15, Mono Adhesive Dots, & Mono Liquid Glue; Cosmo Cricket's The Boyfriend & Early Bird patterned paper; ribbon and ric rac, Maya Road chipboard letter and Basic Grey buttons

Tuesday, May 18, 2010

congrats

It's been a long time since I've made a long card. This size (4" x 9.25") fits into a business size envelope. I used Cosmo Cricket's The Boyfriend line. This line is perfect for any projects relating to school.


I colored the alphabet black with Tombow's Dual Brush marker and the stars yellow. With the fine point of the black pen I doodled around the large cut star. The star was cut with Cricut's George Cartridge.

Supplies:
Tombow Mono Adhesive Dots, Multi Liquid Glue, Dual Brush Pens #N15 & #985,
Maya Road David Chipboard Alphabet
Cosmo Cricket's The Boyfriend patterned paper

Sunday, May 16, 2010

Graduation and etc..


Hello! It seems that lately, I've been apologizing for not posting regularly here. I apologize again. I've been sick since the day before graduation and am just now starting to feel better. I ended up with bronchitis and because I'm now down to one antibiotic that I can have the dr. wanted to try something different. I think I would rather had the antibiotic! It's been a very LONG week.

Well, my 435 cookies got made AND not only that but it only took a little under 3 hours!!!! Can you believe it? Bet you don't, but it's the truth. I have a friend that has a convection (sp?) oven and we were able to bake 3 dozen at a time. We had a system going...fill cookie sheets, put in oven, take out, cool, put in boxes, repeat. Ü Now THAT'S the way to make cookies!

Here are a few pictures of our senior. He was one of 6 students that have been 4.0 since 9th grade, so he had to give a speech. He was the only one that stepped up to the mic and that could be heard and understood. For family that doesn't know...he is planning to attend Chadron State and major in medicine. Right now his goal is to become a doctor, so he has a lot of school ahead of him. Good thing he loves school! LOL! We are so proud of you Benjamin!!

Here are some pictures (alot of them didn't turn out and are blurry)...

table with diplomas


here he is handing out flowers. He had already given me mine. good thing there isn't a picture cuz I was crying. he is hugging his great grandma in this picture. my MIL is wearing black and white and mom is in pink


receiving a medal for 4 years of having a 4.0 GPA

receiving his diploma

I was so busy working that I didn't get alot of pictures taken at the reception. DH took this. this is of the food table. The "trays" the cookies are in are hubcaps (my idea Ü) from his Mustang (his idea)


this is my nephew "helping uncle Bruce make ice cream"...translation playing in the salt. Ü


I want to brag on Aaron too. He received honors for all A's for his freshman year and was chosen as one of four 
Students of the Year by classmates and faculty. We are very proud of you Aaron!!

Finals start Thursday, so it's going to be busy and crazy around here thru next Tues (the 25th) which is the last day of school.

I was able to get some stamping done for Tombow this weekend, so be watching my blog for when those projects go live this week and the next few weeks.

Friday, May 7, 2010

Teacher Appreciation Week

This week is Teacher Appreciation Week and I have a fun project to share with you. I found this fun tutorial on Shannon's blog.


I used fun papers from Cosmo Cricket's Early Bird and The Boyfriend lines. These papers are perfect for a teacher gift. I used Tombow's MONO Adhesive Dots, MONO Aqua Liquid Glue, MONO Glue Stick, and MONO Adhesive Power Bond.


Here is a tip for how I cut the curve for the carton closer flaps. I inserted my piece into an oval punch like shown below. Super easy!
For the ruffles on the chipboard circle, I just hand-sewed a running stitch along one edge of ribbon and then gathered up and knotted and placed behind the chipboard. I glued it with the MONO Liquid Aqua Glue.

This was so much fun to make that I think I will make some more. I filled these with paper clips, erasers that go on the end of pencils, and candy! Ü

Monday, May 3, 2010

Graduation Count Down

Six days til Benjamin graduates! YIKES I'm not ready!! We ended up going and seeing Bruce's grandma yesterday. I didn't get as many things marked off my list this weekend as I wanted, but it was good to just relax for awhile. Now, I'm ready to get busy. Wish I didn't have to work as it only gives me very FEW hours a day to work on things.

Tonite is the senior slideshow. I've never been to one and am looking forward to it. I will have 2.5 hours after school to work on things, so hope I have a very productive time.

TTFN

Friday, April 30, 2010

Just Popping In

I have had several subscribers unsubscribe and I knew that would happen with me being so busy right now. I did want to pop in quick this morning and give you a run down on what is going on in our busy lives.

I am taking a two week break from CSAYL. I just don't have time to work on the projects right now. Please stop by the CSAYL blog today and next Friday and see what the DT has been up to. I will be back after the 8th.

Yesterday was a trackmeet and Benjamin placed second in both of his events...the 800 and 1600 meter races. In the 800 he beat his personal best record by 2 seconds and was really excited by that.

Here is what our lives look like thru the 8th...

tonite: Fine Arts Program that both Benjamin and Aaron will be receiving awards. Benjamin for Quiz Bowl and Aaron for art.

5/1: Conference trackmeet
5/2: church and working on graduation reception
5/3: Senior Slideshow
5/4: Academic Wall of Fame...this is a HUGE honor and both of the boys received invitations to this. You don't know until you get there what honor/award you have been given.
5/5: Baccalaureate
5/6: Baking over 400 cookies!!!!!!
5/7: Trackmeet and baking cookies
5/8: Setting up for Graduation, graduation at 2 pm and reception following
5/9: Mother's Day and probably crashing Ü

I do have a project preposted for Tombow to go post next week. They haven't told me the exact date yet, but it is for Teacher Appreciation week and I love how it turned out. Be sure to stop back in then.

Thanks for hanging in there with me!

Wednesday, April 28, 2010

Pink Paislee notebook

Tombow and Pink Paislee are pairing up this week. Be sure to stop by the Tombow blog daily to see what projects the DT create using the Pink Paislee kit we received.

Altered Notebook

This is a fun little extra gift that is quick and easy to make that I will be adding to the graduation cards I make for the girls on my list. I used paper and diecuts from Pink Paislee's 365 Degrees line and Tombow's MONO Adhesive Dots. The notebooks are mini composition books that Alco stores carry. They measure 4 1/8" x 5 7/8". Perfect for sticking in your purse for list makers or to write down your dreams and goals.

Friday, April 16, 2010

CSAYL #47 To "Die" For


Hello! I am your hostess today and we are going to use die cuts on our Christmas cards for this challenge. This challenge was inspired by a fun die cut Christmas card kit I won from PaperCrafts. The kit is by the company CTMH (Close To My Heart). The kit comes with die cut cards and adhesive back die cut shapes. Super easy to put together and they are flat so no extra postage. Ü Feel free to use your die cutting machines or pre cut shapes to make your card. We can't wait to see what you come up with.

Wednesday, April 14, 2010

this 'n that

I know I've been neglecting my blog and I will try to do better once graduation is over. I have been working on DT assignments and those will be posted when due otherwise it may be a bit quiet until after the 9th of May.

I did want to do the mom brag thing though. Aaron (15) entered an Optimist Essay Contest and won 2nd! The prize was $75. 1st and 3rd place winners were juniors and I was very proud of my freshman. The essay topic they all had to write about was "The Internet: Today's Evolution or Tomorrow's Menace?"  He did an awesome job and I was told by the person who gave him his certificate and check to never let Aaron stop writing. He said he has a wonderful way with words that is a gift. I didnt' tell him that I have a file folder of stories Aaron has written that are so funny and good.

Here is a photo of Aaron receiving his award from Mr. Davis. Mr. Davis was my speech teacher in high school, so it was fun to introduce him to my son.

Benjamin news: He has chosen to attend college at Chadron. It feels so good to finally have this marked off our list. He received the Presidential Gold Scholarship (all tuition paid) and will be majoring in pre-med. After 4 yrs he will have to transfer somewhere else to finish up.

Things are starting to sink in. I made my list last nite of everything that has to be done in 3.5 weeks. There is a lot to do and it's hard working full time, but hopefully I've got it paced out so that it will all get done in time.

Monday, April 12, 2010

Tombow and Cosmo Cricket

I LOVE Cosmo Cricket and was so excited when I learned that Tombow would be partnering with them for the month of April. The two kits I received were Early Bird and The Boyfriend. I have two cards to share with you today using each kit. You will be seeing lots more cards and projects made with these two lines.

My first card uses paper and coordination chipboard from The Boyfriend line. The chipboard has adhesive on the back which makes it even more easier to use.

For my second card I used my favorite kit Early Bird. I love the colors and patterns in this line. This ADORABLE image is from MFT's (My Favorite Things) Pure Innocence line called Apple For You. These images are just so sweet!

I colored the images with Tombow's Markers with a blender pen. Numbers 098, 062, 990, N00, 761, 243, 856, &, 977.

I also used Tombow's MONO Adhesive Dots to put the cards together and MONO Aqua Liquid Glue for the button.


I love the large scallop dies that I've seen people use and don't have one, so punched circles and lined them up behind the dotted patterned paper piece.

See the ribbon on my card? It looked like this first:
The stitching was too white for my card so I just colored the stitching with Tombow's #990 marker. Cool huh? Ü

Thursday, April 8, 2010

Graduation Announcements

I just thought I would show you what I've been busy working on (and am STILL working on). I am taking these to school today to work on during my lunch break and after school while we wait for Benjamin to get out of track. I am hoping by tomorrow they will be pretty much finished (and then we will think of someone else to send to LOL).
The seniors' colors this year are Crimson and Chrome. I LOVE that! So much classier than red and gray. Ü Plus NO purple!!!!!!!!!! YAY!!!! This is the smartest class to graduate! (for real too)

I have already gone through 3 MONO Adhesive Dots cartridges!

Wednesday, April 7, 2010

Live Loud

Another package I received from Imaginisce was from their Live Loud line. This line is perfect for boys! I was needing lots of boy cards and whipped these up super easy.
I also used Tombow's MONO Adhesive Dots. Love this adhesive!


Tuesday, April 6, 2010

Aaron's Mushroom

This card is made using one of Aaron's drawings. I used scraps to put the card together and used Tombow's Mono-Adhesive.

Monday, April 5, 2010

Nugget Bunnies

This fun project is one I will be teaching to the Resource students I work with. They are excited when I teach them a craft. They have to have all their work caught up and this is a great reward for working so hard.


This is super easy to do. I cut the bunnies with my cricut, but you can draw your own bunny head or google bunny images and there are lots online to choose from.

I cut a piece of patterned paper (here I used scraps from my spring block project by Imaginisce) 1.25" by 3". Adhere adhesive (I used Tombow's Mono-Adhesive) on strip and wrap around a Hershey nugget. I drew the bunny face on with a black marker and colored the nose and ears with pink. Markers are by Tombow also.

Use Tombow's Liquid glue to adhere the head to one end of the candy and a pompom for the tail to the other and quickly watch these bunnies multiply. Ü This project is a great one to do with children and a great way to use up all those patterned paper scraps.

**side note: this post was preposted. The students had a blast making these. Those bunnies were multiplying all over the place! Ü I couldn't take a picture of them, because the students I work with are part of the "no child left behind" program and it's confidential.

Friday, April 2, 2010

CSAYL Gift #2


For our second gift challenge, we were to create one of 3 boxes that Maria designed. This was so much fun to make and I plan to fill mine with a gusseted cello bag filled with cookies. I also will be looking for some wide wired ribbon to tie it up in.

Supplies:
paper: Bazzill, Basic Grey, Paper Studio
other: Basic Grey buttons, crochet thread, Tombow's Mono-adhesive and Mono-Adhesive Power Bond

Be sure to check the CSAYL blog for more inspiration AND tutorial link on how to make these boxes.