Monday, June 30, 2014

Pinned It Made It Monday Week 26

I have a simple, but frugal Pinned project to share today. This past weekend my little nephews came to stay as well as my son and DIL. I had made pancakes and forgot that I was VERY low on syrup and there wouldn't be enough, so to Pinterest I went to find a recipe and pinned THIS one and made it. It was yummy and I won't be buying syrup again.


The recipe is called "Make Your Own {Ridiculously Easy and Inexpensive} Homemade Maple Syrup" and it truly is!

Maple Syrup Recipe:
1 cup water
1 cup granulated sugar
1 cup brown sugar (I used dark brown, but she used light)
1/2 tsp. maple flavoring

Bring to boil water in a small saucepan on the stove.
Add both sugars and flavoring and stir until the sugars are completely dissolved.
Remove from heat and let cool, then pour into container. (I just used the syrup bottle that we had emptied)

Chalk Hop


Welcome to the Tombow & Fancy Pants Designs Chalk Hop. I rec'd a lovely package from Fancy Pants Designs and the hardest part was deciding what to make with all the lovely goodies they sent!

For my project, I created this Tea Bag Dispenser using this tutorial here. I am a big tea drinker and have been thinking I should make one of these to hold my tea bags.

I used designer papers & burlap bow from FPD's Burlap & Bouquets Line. The "tea" sticker was created using their Large Chalk Tag and cutting it with one of my Nestibilities Dies and then handwriting "tea" with Tombow's P14 Straw Yellow Irojiten Colored Pencil from their Soft Primary Pencil Set.


Xtreme Adhesive was used to put the box together and adhere the bow to the top of the box lid. 

Would you like a chance to win some Tombow and Fancy Pants Designs goodies? Just leave a comment on Tombow and FPD's blog each day this week, as well as “Like” Both TombowUSA and Fancy Pants Designs on Facebook.


FPD Large Chalk Tags
* The chalk tag design may vary from the photo


There will be a winner on Tombow and FPD's blog—winner to be announced July 7th. This is opened up to Canada/US residents.

Now head on over to Fancy Pants Designs blog to see what their design team created.
  

Friday, June 27, 2014

Frugal Friday 6-27

*needed a baby gift for a shower and didn't have time to go anywhere, so browsed Pinterest and decided to make something with what I have. I made fabric booties and a crocheted hat

*was able to buy fresh veggies and fruit marked down at a local grocery store for good buys

*4 qt ice cream on sale for $3.99. That is very inexpensive here

*rec'd free samples from PinchMe

*used up some shredded chicken that I had frozen a few weeks back. Made chicken enchiladas and was able to send left overs with Aaron for one of his lunches at work.

*watched a free movie on Hulu ..."The Letter Writer"... very good

Wednesday, June 25, 2014

BFB A Broken Kind of Beautiful


I loved A Broken Kind of Beautiful, by Katie Ganshert. I have read other books by her and this one was just as beautiful. This story is about Ivy, a model, and Davis, a photographer, who both have broken lives and images of themselves. This story comes alive in such a way that they seem like real people.

Katie Ganshert writes in such a way that you just can't put the book down. This story is about love and redemption and I highly recommend it.

I received this book for free from Blogging For Books for this review.

Monday, June 23, 2014

Triple Threat Blog Hop


Welcome to the DCWV/May Arts/Tombow Triple Threat Blog Hop!  All this week, designers from these three great companies are sharing projects they created by teaming up some fun paper from DCWV’s Honey Chic Stack, with a variety of adhesives from Tombow and some beautiful ribbon from May Arts. 

If you have come here from Gini's blog then you're on track! If not, you can go back to any of the company websites and start the hop from there.  

I have been wanting to create one of these cute mini coffee cup holders since I saw them hit the internet last year, and finally got some ordered and this hop was the perfect opportunity to create one.

I used THIS tutorial to create the box. (she even tells you where to buy the cups and lids) The paper to the box and cups is adhered using Tombow's Extreme Adhesive. For the lids, I first applied Mono Multi Liquid Glue all around the lids and then let dry. When this glue dries, it is very tacky. After it had dried, I used the pretty May Arts ribbon and pinched and scrunched it as I went around the lid pressing it into the glue for a gathered look.


The hearts on top of the lid are also from May Arts and have peel off paper, so just cut the hearts apart and stuck them to the lid tops.

To finish off, I tied some of the ribbons to the "handle" part of the box. Now, all that's left is to fill the cup with some candies. Ü


Be sure to visit all the blogs today and leave comments for your chance to win some great prizes!  Three lucky readers will win a Triple Threat prize pack of you own, including a stack from DCWV, a spool of ribbon from May Arts and Xtreme Adhesive, Power Tabs, Removable Adhesive and Fastener Tabs from Tombow.  

Winners will be chosen from comments throughout the week, so make sure you check back daily to increase your chances of winning!  Also, please make sure you have popped on over to Facebook and “liked” each of the company pages DCWV / May ArtsTombowUSA), because really, what’s not to like?!

It's now time to head on over to Angela's blog to see what kind of spring craftiness she has in store! 
List of Participants for today
Monday

Pinned It Made It Monday Week 25

I have a cousin who has tried to have a baby for several years. After heartbreak of not being able to have one on her own and adoption fall throughs, she and her DH are the proud parents of a beautiful adopted baby girl.


I knew I wanted to create something handmade and went to Pinterest for some ideas. As far as crocheting has gone, I've not gone too far out of my comfort zone, but was hoping I could read and understand instructions to make a baby hat and I'm excited that I did! I even made a big crocheted flower for the hat, which just adds so much personality to it. This is the PIN and HERE is the pattern for the hat and PIN and PATTERN for flower.


I also decided to make some little fabric shoes. It's been a LONG time since I've done this kind of sewing and they were so easy to make with this PATTERN and here is the PIN.

Then I needed to create a baby card to go with it and used Regina's Elephant Shaped Card file from Cutting Cafe.

Friday, June 20, 2014

USA Blocks

I have had all kinds of computer, camera and silhouette issues today, but my post is finally up for this week's Cutting Cafe challenge. This week, we got to choose any file we wanted. I chose The Block - Template and Cutting File Set as well as Star Box Template and Cutting File and USA Word Shaped Card Template and Cutting File Set.


I had asked Regina if she could design a tall block and this is what I had in mind for using this shape of block. I love anything Patriotic and knew I wanted to make more decorations for my home.

I stretched the star file to measure 3.5" x 2.5" and layered onto a piece of kraft cardstock. It is easiest to decorate the front of the blocks before putting them together.

On top of each star, I layered a rosette that I made from a Lori Whitlock file from the Silhouette store. (shape #32781 3d Build a Rosette Strips) For the "U", I added a mini tag that has "God Bless America" typed from my computer and printed onto designer paper.


Each letter is layered onto 3 thicknesses of kraft cardstock to give it a chipboard look. Behind each rosette, I added some tinsel rope that I had purchased marked down at Hobby Lobby after Christmas. I see they are carrying a Tim Holtz brand year round now.


To finish each block off, I tied some vintage seam binding around each block with a bow at the top. I added some dried beans (filled the blocks about 1/3 full) into each block to make them a bit heavier and sturdier. I used Xtreme adhesive to adhere the pieces together and Power Tabs for the buttons.

I really love the end result...Patriotic, shabby, and just "me".

For a chance to win 3 Cutting Cafe files of your choice, be sure to stop by the blog tomorrow and leave a comment AND to check out the files that the rest of the DT chose to create with this week.

Tuesday, June 17, 2014

Milk & Cookies

I have another cheery card from Inky Antics' 11226MC Better Together Clear Set (drawn by artist Trudy Sjolander). This one using the Milk & Cookies image.


Images are colored with Irojiten Colored Pencils and all the pieces adhered with Mono Adhesive Mega Roller. This roller is on sale on the Tombow USA website right now, so be sure to head over there to take advantage of the sale.

I even decorated the inside of the card.

Monday, June 16, 2014

Pinned It Made It Monday Week 24

I have a very corny post to share with you today. I made this "card" for my dad for Father's Day. I got the idea for it here. It wasn't easy writing the candy gram out when I had to use such large boxes of candy, since I couldn't find regular sized ones, but he thought it was funny, so that's what mattered.

I didn't get a picture taken of what I gave my FIL, but it was a "just add ice cream" basket filled with ice cream cones, homemade toppings, and sprinkles.

Friday, June 13, 2014

Frugal Friday 6-13

Not sure why this didn't post yesterday.
Been a slow two weeks (frugal wise).


*Still eating wedding leftovers, so that has saved on food bill
*spinach 99¢ bag
* bag of jalapeno's 99¢
*downloaded free book from Book Bub
*rec'd a gift card to Subway
* earned $25 in Swagbucks...put it towards Amazon
*bought some garden plants from Amazon....free with my swagbucks
*planted a large garden...can't wait for those firsts...tomatoes, peppers, onions, cucumbers, etc Ü
*ck'd books out from the library


Anna Wight Guest Designer

Today the Tombow Design Team is hopping with Guest Designer Anna Wight. I have been a long time fan of Anna's. We both live on farms, garden, enjoy canning, papercraft, sew, etc and I love her style.

My project today is using Inky Antics' 11226MC Better Together Clear Set (drawn by artist Trudy Sjolander).

I colored the image with Tombow's Irojiten Colored Pencils and used StickiTrac Adhesive to put the card together. The image is raised with Foam Tabs.


Here is the prize package for this week:


In order to enter to win the prize, please comment on all the Design Team’s projects this week. Tombow will announce our winner on Monday June 16th at 3:30 P.M. EST.

Now it's time to hop on over to Melissa's blog to see her lovely project for this week.

Here is this week’s Line-up:
Tombow Blog

Debbie Fisher
Melissa Cash
Jennie Garcia 
Marie Browning


Monday, June 9, 2014

Pinned It Made It Monday Week 23

For today's post I am sharing a Strawberry Cheesecake Salad I found on Pinterest that I made for Benjamin and Kassy's rehearsal supper. Well, actually I didn't make it, I had my niece put it together for me. She was such a big help!


The photo is a little bit blurry, but the salad was delicious. I tripled the recipe to fill this large bowl.

Strawberry Cheesecake Salad

via: Food.com
Photo

  • Prep Time: 30 mins
  • Total Time: 30 mins
  • Servings: 12

Ingredients

  • 12 ounces whipped topping
  • 1 (3 1/2 ounce) packages cheesecake flavor instant pudding and pie filling mix
  • 3 (6 ounce) packages strawberry yogurt
  • 1 lb fresh strawberries, sliced
  • 3 bananas, sliced ( add just before serving or they brown)
  • miniature marshmallow ( add just before serving)

Directions

  1. Thaw whipped topping and in a large salad bowl stir together whipped topping, yogurts, and pudding powder. Let this set up in the fridge for at least an hour before serving. Wash and slice strawberries. You can add strawberries to salad or wait to add them with sliced bananas and marshmallows just before serving. Keep refrigerated.
What I changed: the grocery store didn't have 9 containers of strawberry yogurt, so about half of the yogurt was strawberry/banana which worked perfectly for this recipe.

This is so refreshing and I think it would be good with other flavored yogurt and fruit: blueberry, peach, etc.

I finally got caught up on some sleep and other stuff this past week and am working on a 3 part wedding post for the blog, that hopefully will happen this week or next.

Saturday, June 7, 2014

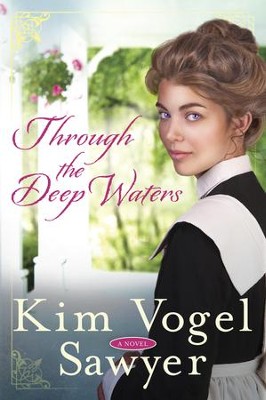
BFB Through Deep Waters

Through the Deep Waters - eBook   -     By: Kim Vogel Sawyer
Through Deep Waters by Kim Vogel Sawyer was a bit harder for me to read in the beginning, but I kept on as I am a fan of her work and I knew it would be worth it in the end and it was. It was only hard because of the content.

17 yr old Dina Hubley is the daughter of a prostitute who didn't want her. Dinah wants to escape the Brothel to become a Harvey Girl waiting tables along the railroad in a respectable hotel. Through some very sad events, she is able to start our as a chambermaid at the Clifton Hotel because she is not old enough to be a Harvey Girl at the time.

She falls for Amos Ackerman, a chicken farmer and has to decide whether to leave her dreams behind to be a Harvey Girl or keep following her dreams. She doesn't feel worthy because of her past, but Amos has struggles of his own.

    Blogging for Books provided this e-book to me for free in exchange for an honest review

Friday, June 6, 2014

Patriotic Card in a Box

Hello and welcome to Cutting Cafe's new schedule and challenge for June. Cutting Cafe will now be showcasing the design team's projects on the 7th and 21st.

This week we were challenged to use Regina's Card in a Box file. With this file you not only get the card box file, but several images to use for whatever theme you would like. For my project, I chose the stars to go with a Patriotic theme.

I love all things red, white, and blue, and with the holidays coming up...Flag Day and 4th of July, this was a perfect choice for me. I think this little box would even be cute just sitting out on a shelf.


There are two sizes of boxes to work with and I chose the small box. There are a couple of changes I made along the way. I enlarged and decreased the star image so that I could layer 3 stars rather than 2 and I cut the flap pieces down so that the box part behind the flaps showed a bit more.

I added glitter around the stars for some sparkle and all the designer papers are from Fancy Pants Design's Nautical line. The kraft cardstock is from Michael's and the adhesives I used are from Tombow (Xtreme, Mono Aqua Liquid, Mono Adhesive Dots).

If you stop by the Cutting Cafe starting tomorrow and leave a comment, you will have a chance to win 3 of your favorite files!

Monday, June 2, 2014

Pinned It Made It Monday Week 22

Good morning! Today's pin is one I've had pinned for quite some time and decided to give it a try. It is a grease removal tutorial  for getting grease stains out of clothes. I don't know how I manage to get them, but I do and it seems it is always on new shirts!

I was so excited that it worked and it was so easy! AND I had the items needed on hand to do it. Here is a picture of my shirt with the grease stains:

and here is a picture of after:


instructions via http://wegotreal.com/remove-grease-stains/

1.  Put a few squirts of dish soap on the stain and gently agitate with your fingers,  a soft wet toothbrush, or by rubbing the fabric together. (I used Dawn)

2.  Let sit for about 15-30 minutes.

3.  Rinse thoroughly. At this point, I couldn’t tell if the stain was there or not, so I proceeded with the next step just in case.

4.  Add 1-2 T. of baking soda and again agitate.

5.  Let sit for another 15-30 minutes.

6.  Wash in cold water as normal.

DO NOT DRY!  Check to see if stain is out and if not, repeat steps.  I let mine air dry and the stain was completely gone.  

Get Well Soon

This post has been preposted. I will be back later with wedding pictures, but now on to Tombow's monthly challenge. Marie is the hostess this month and her theme is anything with bird(s).

I love this image drawn by Tammy DeYoung for Inky Antics. Even though the turtle is the main "character" in this card, I love the little birdie that is cheering him up! We all need "somebirdie" when we are down. Ü (sorry couldn't resist the pun).


I used Inky Antics 10975SC Sick Turtle Clear Set, Irojiten Colored Pencils, Mono Glue Pen to add glitter to the umbrella, Power Tabs, and Mono Adhesive Permanent. Then for fun, I added some white dots to the turtle and birdy's cheeks.

Come and play along with us for a chance to win this great prize shown below. Be sure to check out all the details on Tombow's blog.