Monday, April 29, 2013

Tombow/ Walnut Hollow Blog Hop

Welcome to Tombow/ Walnut Hollow Blog Hop.  
 
This week Tombow’s Design Team will be showing off some of their favorite creations with Walnut Hollow's high quality wood products. 
 
If you have come here from Tombow's blog  then you're on track! If not, you should go back to the Tombow blog and start today’s leg of the hop from there!

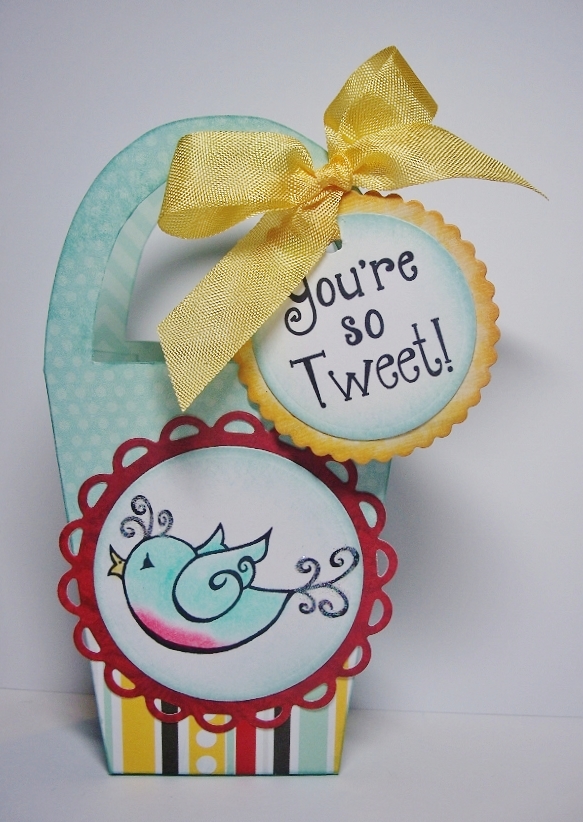
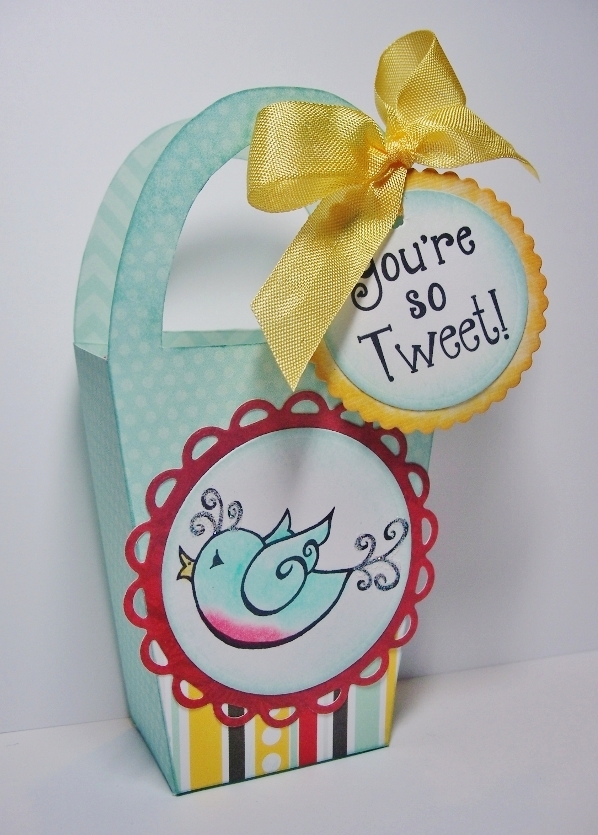
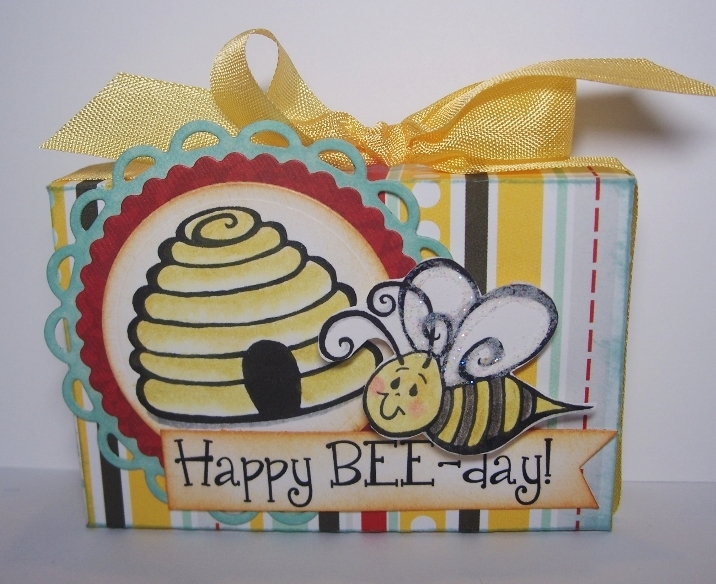
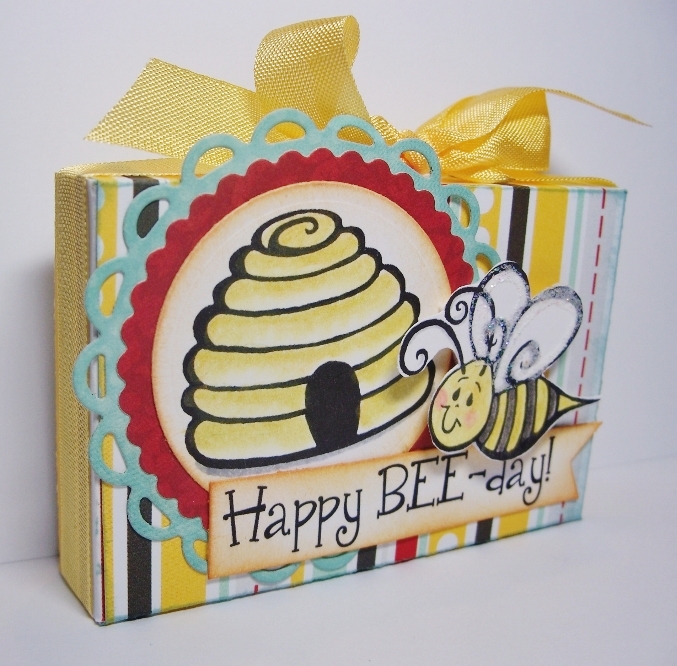
I used Walnut Hollow's 6 x 6 Basswood Canvas  & Tombow's Mono Aqua Liquid Glue to create my project. I hand cut all the pieces and then glued them down. With a permanent pen I drew in all my squiggles and then "painted" on a layer of the Aqua Liquid Glue to seal the papers.


Be sure to visit all the projects featured this week and leave a comment for your chance to win!  
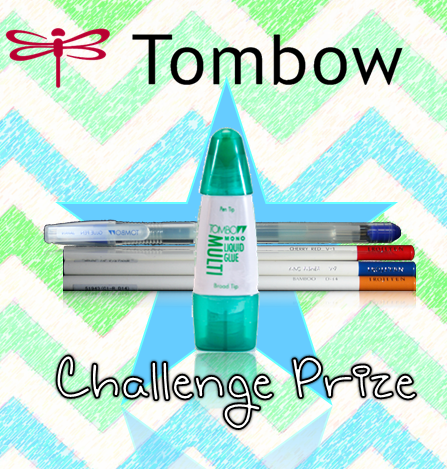
We will be giving away an amazing prize pack with both Walnut Hollow and Tombow Products.


This prize includes Walnut Hollow’s Card Keeper Box, 3 pc Clock Kit, Birdcage Clock and Creative Versa-Tool®. It also includes Tombow’s Mono Aqua Liquid Glue, Fastener Tabs, and Power Tabs.

The more you comment, the more chances you have to win! The winner will be announced Saturday May 4th  at 3:30 P.M. Eastern Time.

Now, head on over to Walnut Hollow's Blog to see what kind of spring craftiness they have in store!

Wednesday, April 24, 2013

New Monthly Challenge on Tombow

Hello Tombow Fans,

Starting this month the Tombow DT is going to take turns posting a challenge for you all to play along in AND a chance to win prizes. YAY! You will have one week to complete the challenge and link us up to your project right here on the Tombow Blog. I am your first hostess and my challenge is a "tic tac toe" type of challenge. Looking at the chart below, use 3 Tombow product that create a "tic, tac, toe".  Create your project and upload to your blog or any other place like FB, Flickr, Splitcoaststampers, etc and then link it here. Please list what 3 products you used in your post.


For my You're So Tweet project, I chose the diagonal from the top left to bottom right option (Irojiten's, Mono Multi Liquid Glue, & Glue Pen). I colored this cute Inky Antics' image with Irojiten Color Dictionary Pencil's and then blended with Gamsol.
bird front
 
The box is also a Inky Antics stamp that you just stamp, cut and score and put together. I love using Mono Multi Liquid Glue for these boxes. I know the glue is going to hold and don't worry about the boxes coming apart.
bird side
 
The Mono Glue Pen is PERFECT for adding glitter for fine areas (as well as adding adhesive to small pieces). I also used Mono Adhesive Permanent to adhere the circles together.
Now it is your turn to play. I can't wait to see what you come up with. You have until April 30 midnight to play along.
The Winner will be announced May 1 at 3:30 P.M.
 
Here is what you are playing for:
debbie_challenge Prize
Mono Glue Pen, Mono Multi Liquid Glue, & Irojiten Color Dictionary Pencils King Fisher, Bamboo and Cherry Red
 
Head over to the Tombow blog to play along.

The Winner will have one week to claim his or her prize!

Monday, April 22, 2013

Pinned It Made It Monday

Since we had a snow day last week on Thursday and then Friday no school due to our school hosting SWC Music, it made for a wonderful long weekend. I went to Pinterest for inspiration of what to make for dinner one day and found another yummy recipe for chicken enchiladas. I didn't have any flour tortillas, but remembered I had a recipe pinned, so looked it up and we had a super yummy dinner!

P1220498
here are mine

rolling them out thin
frying them in our cast iron skillet

They were soooo good that it is going to be really hard to buy store bought now. Ü

Then I remembered reading HERE on Pinterest about shredding chicken with a Kitchen Aid Mixer! No kidding, it works! I just boiled some chicken breast and then drained them (saved the broth for chicken and noodles the next day) and put the breasts in the mixer and using the paddle, it shreds up perfectly!

 Here is a picture of the enchiladas 
mine
yummy recipes that are keepers and will be making again!
I am linking this up to Country Girl at Home for her Pinned It Made It Monday challenge.

Tortillas
(original Recipe from Urban Spork )
Ingredients
  • 2  3/4 cups all-purpose flour, plus a little extra for rolling the tortillas
  • 5 tablespoons vegetable shortening
  • 3/4 teaspoon salt
  • 3/4 cup very warm tap water

1. Work the vegetable shortening into the flour with your hands. Make sure to fully incorporate it and rub it in completely.
2. Dissolve the salt in the water. Work the water into the flour - shortening mix with a fork until a dough forms.
3. Turn the dough out onto a lightly floured surface and knead until the dough smooths out. 
4. Roll the dough out into a log and cut into 12 equal pieces. Roll them into balls and either cover with plastic wrap or place in a plastic wrap. Let them rest for at least 20 minutes
5. Preheat an ungreased heavy skillet or griddle to medium high. Then roll out the dough into seven inch circles.
6. Cook the tortillas (I do them one at a time) for 30 seconds on each size. The tortilla should sizzle a bit when you place it on the hot pan.
7. As you cook them keep the other cooked tortillas warm and soft on a tinfoil covered plate. Let them soften covered by tinfoil for a minute or two before using. The tortillas on the bottom will be softer than the ones on top so use those first.

CREAM CHEESE CHICKEN ENCHILADAS

Serves 4
Ingredients:
5 oz. reduced fat cream cheese, softened
1/4 cup light sour cream (or plain Greek yogurt)
10 oz. can of enchilada sauce
1 cup shredded cheddar cheese, divided
1 cup shredded monterey jack cheese, divided
2 cups cooked shredded chicken
1 cup frozen corn kernels, thawed (canned corn works, but drain it first)
4 oz. can diced green chiles
1/2 tsp chili powder
1/4 tsp cumin
Salt and pepper
4 scallions, thinly sliced
8 (8-inch) whole wheat tortillas
Directions:
  1. Preheat oven to 325 degrees. Spray a 9×13 dish with cooking spray.
  2. In a large bowl, cream together the cream cheese, sour cream, and 1/2 of the enchilada sauce. Stir in 1/2 cup of each type of cheese.
  3. In a second bowl toss together the chicken, corn, cumin, chili powder, salt and pepper, green chiles, and half of the scallions. Add the chicken mixture to the cheese mixture and combine well.
  4. Spread about half of the remaining enchilada sauce (1/4 of the can) in the bottom of the baking dish.
  5. Spoon the filling into each tortilla, roll the tortilla up, and place in the baking dish with the seam down. Pour the remaining enchilada sauce over the top of the filled tortillas and sprinkle with the remaining cheese. Bake for 20-25 minutes or until hot and bubbly. Sprinkle with the remaining scallions and serve.
Source: Adapted slightly from Buns In My Oven

Friday, April 19, 2013

May Arts Canvas Bunny

May Arts Ribbon Spring Craft Challenge
May Arts is my favorite ribbon company and I have been so blessed to work with their ribbons through Tombow for CHA and "just because". I love all the inspiration on their blog and they had a challenge recently where they posted these ribbons and asked what you would create with them. If you were chosen, they sent you four of the ribbons of your choice and you had a certain amount of time to create your project.

I was so excited when I received an e-mail from Bethney telling me that my idea had been among one of the chosen! The theme was spring and these were the ribbons we got to choose four from.

May Arts Ribbon Spring Release
I chose the following:
Teal String: 449-34
White Eyelet: 447-38-01
Natural Burlap: 398-4-11
Salmon Faux Lightweight Canvas: 444-58-20

Here is the project I created.

Instructions:

Fold burlap in half and stich half way up from the bottom.


Fill with candy or stuffing of some kind to help it "sit".

Tie end in a knot to form ears.


Color inside ears and face with Dual Brush Pens.

Gather in center of white eyelet to form a tail, adhere to back of bunny with a Power Tab.

 
Tie salmon canvas ribbon into a bow and adhere with Power Tab to front of bunny at the top of the head.

Weave teal string below drawn nose and tie in a knot. Unravel to form whiskers.
 
I was even more excited today to learn that my bunny made the top 10! I get to choose a roll of ribbon of my choice. So many to choose from! Thank you so much May Arts for this opportunity to play, win, and receive more goodies!
 
Would you like to play? They have a new challenge posted with a nautical theme. You can read about it here on their FB page.

Tuesday, April 16, 2013

Pinned It Made It Monday


My son has gone to Texas Roadhouse and said that the buns are the best there. I found a recipe for them and a honey cinnamon butter that is apparently served with them and thought I would give them a try.
 
source

mine
 
butter
source

mine
 
I need to go to Texas Roadhouse to try theirs as I didn't think these were anything special. I have a roll recipe that uses mashed potatoes that I think is the best bun recipe ever. These were kind of heavy. Any bread out of the oven is yummy, but I wasn't that impressed. The butter however was yucky to me. It is honey, butter, powder sugar and cinnamon. I'm not a "butter on my bread" person, so that didn't help and I didn't like the powder sugar in there at all! I DO love honey on bread or homemade jam, so I ate that, while the guys ate the other.

However, I did make this Bruschetta Dip that was quite delicious. I made it without the pastry. I cute the Roadhouse rolls in thirds and buttered and toasted them on both sides and then spread the dip on. It was soooo yummy!


mine
 
I am linking this up to Country Girl at Home for her Pinned It Made It Monday challenge.

Monday, April 15, 2013

Tombow Hops with Elizabeth Craft Designs


Today the Tombow DT is hosting a blog hop using Peel Off Stickers by Elizabeth Craft Designs. If you have come from the Tombow blog, you are in the right spot. If not, be sure to stop by there so you don't miss out on anything.
For all 3 projects, I used these beautiful Elizabeth Craft Designs Peel Off Stickers called Butterfly (small).

I colored all of the images with Tombow's Dual Brush Pens and blender on watercolor paper. All pieces were adhered using the Dot Adhesive Stamp Runner.
 
I used My Mind's Eye designer papers on all 3 as well. I am loving how each one turned out. I'm thinking though that the middle one is my favorite. Which one is your favorite?

Next on the hop is the super talented Melissa. I know you are you are going to love what she created!


In order to qualify to win this AMAZING prize you must:

1. Comment on each of the Design Team Member's blog post.
2. Comment on the Elizabeth Craft Blog.
3. Last, Comment back on this blog  post.
Be sure to visit all the projects featured this week and leave a comment for your chance to win! The more you comment, the more chances you have to win!
Tombow will selected at random from a comment written on either the Design Team Members' blogs, the Elizabeth Craft blog, or the Tombow blog as the winner. This will be announced Friday April 19, 2013.


Special Thanks to Elizabeth Craft Designs for the wonderful images we received to create with!

EC

Thursday, April 11, 2013

Moxie Fab Tuesday Trigger Challenge

It seems I never have time to play in challenges any more. But with the 2 snow days and late start all in a row, I was able to get in some paper crafting. I LOVE this photo inspiration posted on Moxie Fab! It is looking NOTHING like spring here! I also love the colors, so soft and pretty.
 
I have these beautiful Elizabeth Craft Designs Peel Off Stickers called Dragonfly and thought this particular flower image fit the photo best. I colored the images with Tombow's Dual Brush Pens and blender on watercolor paper. I never would have put the purple and orange together on my own and love how it turned out!
 
First I created this card. I used yummy papers from My Mind's Eye, eyelet lace from May Arts and some fun heart brads a friend sent me a long time ago and matched perfectly. I had the thank you rub on in my stash too and have no idea where it came from.
 
Then I decided if I was going to make a thank you card, it would be fun to have a little gift to go with it, so used the scraps and another peel off to create this note pad.

 
I love how both of these turned out.
 
Here is a picture and list of the colors I used (from top to bottom):
800, 673, 665, 985, 946, 158, 177, 491, N89, N00 (blender)
 
Would you like to play along too? Just go HERE for information on how to play.

Wednesday, April 10, 2013

Pinterest

On the right sidebar, I have added where you can follow me on Pinterest. Also, if you would like to pin anything I post, just hover over the picture and you will see the pin button to click.

We are enjoying snow day #2. Yesterday was more sleet/ice day, but today we have added snow on top of the sleet/ice. I am hoping the roads are good by tomorrow morning as I have to be to work early.

Right now though, I am enjoying being home. Lots of baking, cooking, and card creating going on. Ü

Tuesday, April 9, 2013

Pinned It Made It Monday (on Wed)

I'm a couple days late with my Pinned It Made It post, but have a yummy recipe to share with you. I needed to use up some bits and pieces of items I had in the refrigerator, so went to Pinterest to see what I could come up with. I have already shared the chicken pizza with you, but here is another one...Philly Cheesesteak Pizza.
source: Mrs. Happy Homemaker
 
The only difference is that I used some canned beef that we had a little bit left over from another meal this week. We are almost out of canned beef that we did ourselves, but soon it will be time to butcher again, so will have more and we loved this recipe, so will be making it again.
 
 
I am linking this up to Country Girl at Home for her Pinned It Made It Monday challenge.

Graduation Owl Box

Happy Tuesday! Hard to believe we had 70's degree weather yesterday and winter storm today! BUT the calendar says spring AND April and graduation is just around the corner for us (May 11), so I need to get busy on cards, gifts, and announcements, etc. My "baby" will graduate and I'm not ready (okay, let's not even go there)!

Here is a cute little box I created using an owl image from Inky Antics. It comes with a "hoo-ray" above the owl, but I colored the owl with Irojiten Color Dictionary Pencils and then cut it out.
101_2455 (675x900)

The lovely papers are My Mind's Eye. The owl was adhered to the circles with Stamp Runner Dot Adhesive  and then behind that a wobble. When you put your finger on the edge of the circle and pull down, the owl wobbles. Ü

The box was put together using Mono Multi Liquid Glue. The box is one I have had around for a very long time. One year our little library had an Ellison Die Cut there for a month. I took a LOAD of cardstock down and cut these boxes and still have a bunch left over. I thought this would be the perfect size to add some sweet treats and a gas gift card. Perfect for a masculine graduate gift!

Do you have any graduates you need to create for? If so, what are you creating? I need lots of ideas.

Tuesday, April 2, 2013

Bee Box

Hello! Did you all have a wonderful Easter? My kids were here along with one's girlfriend and my nephew and we all had a great time. Today I have a fun 3-D Bee Box to share with you all.

bee box front

The box is an Inky Antics stamp that you stamp onto designer paper (tip: use a pale color so that the lines don't show on the inside), then cut, score, fold and glue together. I like using Mono Multi Liquid Glue so that I know it will STAY put together.

I colored the hive and bee (also Inky Antics) with Irojiten Color Dictionary Pencils and added glitter with Mono Aqua Liquid Glue.

bee box side

So that the ribbon doesn't fall off, adhere it to the bottom and sides with the Dot Pattern Adhesive Stamp Runner. The bee is added to the front with foam tabs.

Monday, April 1, 2013

Pinned It Made It Monday

I am back with a project for Pinned It Made It Monday. I actually had this for last week, but got a bad case of the flu and didn't get online to post it.
 
I made several of these using yarn that was left over from all the dishcloths I made. Ü
Here they are sitting on the table runner I created earlier. The eggs are actually aqua colored and match the runner and coasters, but look blue in the picture.


I am linking this up to Country Girl at Home for her Pinned It Made It Monday challenge.