Wednesday, February 26, 2014

Cutting Cafe Paper Flowers

Oh me, oh my....I have a new addiction! Regina's Paper Flower Set is so much fun to play with. I've never used 3-D paper flowers, so didn't really know what to do with them. I am showing you 4 flowers I created (one of each size in the file) and some tips that helped me along the way.


I took a picture of them with a ruler, so that you could get a better idea of the actual size. I followed Tmkika's video tutorial for the first one (with the exception of me inking my flowers) and then found some things that worked better for me.

Tmika puts glue on the flower that has been formed and then adheres it to the next layer and for some reason, I kept getting mine off center. So, I put the glue in the center of the next layer and then adhered my worked flower into it and had better luck. Just play around and see what works best for you.

In forming the bud, I found that if I took every other petal to the center first and then the other 3 around it, I was able to get a bud I liked best, and it seemed to just "flow" better for me.

I used a Chatterbox Empressor to do the embossing. Mine has dual rollers of 2 sizes. I used the larger end on the 3 largest flowers and the smaller end on the smallest flower. It worked perfectly, since the ball ends roll and didn't tear my paper.

My last tip is to use a fine spray spritzer. I only had a spray bottle and it just sprayed too much water, no matter how lightly I did it. I then had to wait for it to dry some, before I could start embossing my petals.

I did some Pinterest and Google searching and have finally decided on a project using this cutting file, so will be sharing that later as I need to pick up a couple of supplies at Hobby Lobby to create it.

If you would like a chance to win this file or any others on Cutting Cafe, be sure to stop by the blog tomorrow and leave a comment for a chance to win 3 files of your choice.

Tuesday, February 25, 2014

Love Lifts Me

Hello from snowy Nebraska! We have had a very mild winter and then 40% chance of snow is forecasted, we get 3" plus ice! Go figure!

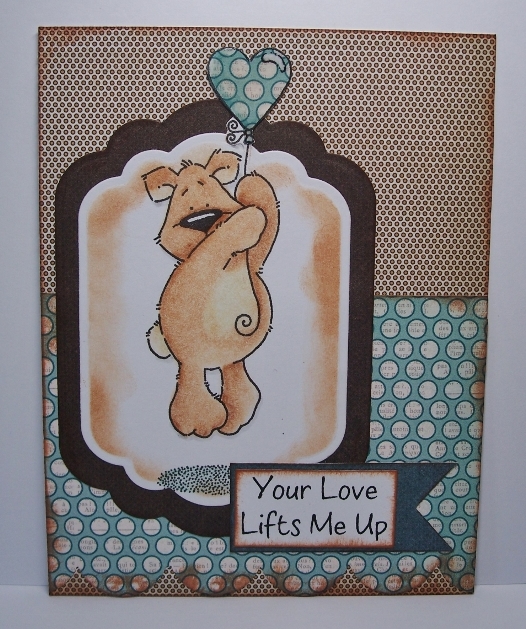
I know so many of you are ready for spring. I am itching to get some gardening started too. So today, I decided no winter project and have this cute card to share with you.

The image is from Inky Antics. I colored it with Irojiten's and used Mono Adhesive Dots  to layer the pieces and a Foam Tab to pop the balloon a bit.
101_2949 (900x675) (900x675)


Monday, February 24, 2014

Pinned It Made It Monday Week 8

One of the items on my "50 things I want to do before I turn 50" list was to crochet something new. Now while crocheting dishcloths is not new to me, this pattern is. I'm trying to make new crocheting items, so that hopefully come day I can create something that isn't square or rectangle.

I have pinned THIS post and decided to give it a try. Well as you can see below, I ended up making 16 dishcloths. However 2 of them are from this PIN.

The pattern on Crochetmore says to chain 40, but I thought that was too large, so I only crocheted 32 and then continued as the pattern indicated.


Now I have more dishcloths in my stash for quick little gifts when I need them.


Block Party Winner

Gail Slagle you are the winner of the Fun with Blocks cutting file. Congratulations!


Thank you everyone for  your kind words. I had so much fun creating with the blocks all week.

Saturday, February 22, 2014

Block Party Day Seven

**Note: I am going to give everyone until Sunday night midnight to comment, as some subscribe to my e-mail and don't see the post until the next day. I will draw a name Monday morning.


Today is the last day of my Fun with Blocks Block Party. I have had a blast and am definitely not done creating with this file. I have so many ideas of what I want to create with them.

I decided to go out with a big project and connected the blocks to this sewing machine from the Sewing Machine Set.


I am loving how this turned out and it will sit on my sewing machine table.


One of the things I did different with this set of blocks was added dried beans in them to make it more sturdy. I can't believe how heavy it is with just a few beans in each box.


In the view above you can see the matchbox. Pull on the brad and I can store goodies in there.

Thank you for taking this Block Party ride with me. Be sure to comment on any or all of the posts this week and I will draw a name sometime on Sunday. When you comment, make sure you are signed in or leave your e-mail, so that I can get a hold of you.

Friday, February 21, 2014

Frugal Friday 2-21

*unfortunately we had to use the dryer two weeks ago. I saved on dryer sheets as I use one sheet per 3 loads. Thankfully it was then in the 50's a few days later, so the clothes were back on the line Ü

*made Valentine's and sent to the kids in college...saved postage money with Benjamin's as Kassy headed there today, so was able to send theirs. Was able to save big time on the goodies as I didn't get all my Christmas goodies made since I ended up with the flu, so made them Kibbles n Bits; peanut butter, chocolate chip banana bread and Big Red Popcorn (see recipes below)

*made my own taco seasoning when we had tacos this week. I've been doing this for quite awhile and have forgotten to share as it has just become habit now.

*earned $35 through Swagbucks (I now have enough money earned to get curtains for the living room. YAY!)

* reused ziplock bags

* finished the apples WHEW!! We have gallon containers filled with dried apples now

* made 2 batches of bar soap...want to try some liquid soap now

* free loaf of bread with store e-mail coupon

* used coupon for first lb of bananas free...paid 7¢ for 4 large bananas

Taco Seasoning
2 T. flour
2 t. chili powder
1 1/2 t. dried minced onion
1 1/4 t. salt
1 t paprika
3/4 t. crushed boullion cube
1/4 t. sugar
1/4 t. garlic powder
dash onion powder

Mix all together and stir into your cooked hamburger and 3/4 cup of water. Stir until thickened.

Kibbles n Bits
1 stick margarine
1 c. peanut butter
6 oz. chocolate chips (I use semi sweet)
8-9 c. cereal (cheerios, rice and corn chex)
2 c. powdered sugar

Melt margarine, peanut butter and chips and pour over the cereal. Mix well til cereal is covered. Put powdered sugar into a grocery sack. Dump cereal into sack and shake until well coated.

Big Red Popcorn
5 qt. popped popcorn
9 oz. pkg red hots
1/2 c. margarine
1/4 c. corn syrup
1/2 t. salt

Cook red hots, margarine, syrup and salt in microwave. Stir often. Boil 1 minute. Pour over popcorn in grocery sack; stir. Cook on high in grocery sack in microwave for 1 minute. Shake and cool. Break in small pieces.

Reeses's Peanut Butter Banana Bread (I didn't have any Reese's so just used chocolate chips)


Block Party Day 6

Hard to believe this week is almost over! Today's Fun with Blocks project is also for my DIL2B. I already had this cut out on Sunday and when she commented on my first calendar blocks, I knew she was going to like this one for her classroom.


This one was put together like my first one with the exception of the decorating at the back top. I used the apple again from Apple Treat Box and the sentiment is just typed and printed out.


If you would like a chance to win the file to create your own blocks, leave a comment on today's post (as well as Sunday through Thursday's and tomorrow).

Thursday, February 20, 2014

Block Party Day Five

Today's Fun with Blocks project is for my DIL-2-B. She is a teacher and I thought this would be a perfect decorative item in her classroom.

Along with the Fun with Blocks template, I also used the apple file from Apple Treat Box.


I used green, red, and yellow as that is the color of apples. I liked the school looking lined paper, so used that to go behind the apple. The boxes are all tied together with May Arts ribbon.

If you would like a chance to win the file to create your own blocks, leave a comment on today's post (as well as Sunday through Wednesday's and the rest of the week).

Wednesday, February 19, 2014

Block Party Day Four

Here I am half way through my week of block projects using Cutting Cafe's Fun with Blocks template file . I think each day, I end up thinking that project is my favorite and today is no exception. I really love how this turned out. This is for us. I don't have a lot of decor in my home and this will fit perfectly.


These blocks were cut at 80%. Just remember that if you shrink the blocks, you need to shrink the alphabet too. I sewed all the background pieces and then decorated the letters. The blocks are all glued together with Mono Multi Liquid Glue, letters are adhered with Mono Adhesive Dots and blocks are formed with Xtreme adhesive.


The ribbon ties it all together and is from May Arts. I typed "faith" and "love" and punched with my mini tag punch.

If you would like a chance to win the file to create your own blocks, leave a comment on today's post (as well as Sunday through Tuesday's and the rest of the week).

Tuesday, February 18, 2014

Block Party Day Three

The party continues...

Today's project is using the calendar block file in the Fun with Blocks template file and Envelope Template Set using the scallop envelope.

I think each day, I end up with a new favorite of the blocks! I have several ideas of using this particular calendar block file and you will be seeing more of them in the weeks/months to come. I'm thinking this would make great Christmas gifts too.


I made the blocks and block holder the size that the file came in. I'm thinking this would even be cute to shrink.

I enlarged the numbers a little bit to be 2" tall. The file comes with them being 1.5", but since I didn't add a background decorative piece, I decided to make the numbers a little bit larger. To make the numbers on the block work for a calendar, you need to put 0, 1, 2, 3, 5, 6 on one block and 0, 1, 2, 4, 7, 8 on the other.

The months were printed in MSWord and mounted on a heavy cardstock and cut out. They adhere to the front with 1/2 of a Tombow Fastener Tab. (months do come with the file, but I wanted to do them a bit differently and have them a certain size) I haven't done it yet, but I am going to cover the fronts of the months with clear contact paper to protect them.

I typed the sentiment in MSWord and then glued it to the top of the back piece. I thought it was appropriate for numbered days.

All of the numbers are adhered to heavy cardstock with Mono Adhesive Dots and then adhered to the block with the same adhesive. The blocks and calendar frame are all put together using the new Xtreme adhesive.

I knew I wanted a way to keep all the months with the calendar blocks, so I created an envelope using the Envelope Template Set, adhered it to the back with Xtreme adhesive and put the other months not in use in there.
Don't forget to leave a comment on today's post (as well as Sunday and Monday's and the rest of the week) for a chance to win the Fun with Blocks template file.

Monday, February 17, 2014

Block Party Day Two

I am having so much fun with this Fun with Blocks file! Today's project is a decoration for my son and DIL's- to- be wedding. I am loving how it turned out and hope Kassy does too. She hasn't seen it yet.

They are decorating with burlap, doilies, ribbon and jars, so I tried to implement as much of those items as I could.

Yesterday's blocks were cut at the size given in the file. These were shrunk at 80%. Because the black cardstock was thinner, I cut 5 of them with the letters to layer.

Would you like to win the Fun with Blocks file? Just leave a comment here and on each post this week for a chance to win. Each time you enter (only one entry per day), your name will be entered and drawn on Sunday.

Pinned It Made It Monday Week 7

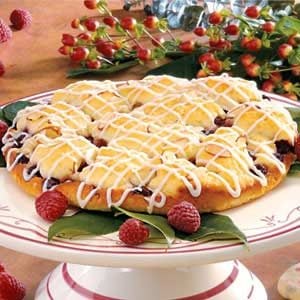
Oops, with all my block party projects, I forgot to make this go live. I made this raspberry coffee cake last week. I first made this several years ago after my FIL's heart surgery. The dr. had told his kids they needed to change how they ate then and after we got home, I went thru recipes trying to find heart healthy ones and this is a favorite I found in Taste of Home.


 Raspberry Coffee Cake Recipe
source: Taste of Home

This is very moist and yummy. I made it a few weeks ago for my brother and SIL and they enjoyed it too.

Glazed Raspberry Coffee Cake

8 ServingsPrep: 20 min. Bake: 35 min. + cooling

Ingredients

  • 1 cup King Arthur Unbleached All-Purpose Flour
  • 1/3 cup sugar
  • 1/2 teaspoon baking powder
  • 1/4 teaspoon baking soda
  • 1/4 teaspoon salt
  • 1 egg
  • 1/2 cup reduced-fat plain yogurt
  • 2 tablespoons butter
  • 1 teaspoon vanilla extract
  • 3 tablespoons brown sugar
  • 1 cup unsweetened fresh or frozen raspberries
  • 1 tablespoon sliced almonds
  • GLAZE:
  • 1/4 cup confectioners' sugar
  • 1 teaspoon fat-free milk
  • 1/4 teaspoon vanilla extract

Directions

In a bowl, combine the flour, sugar, baking powder, baking soda and salt. Combine the egg, yogurt, butter and vanilla; add to dry ingredients just until moistened. 

Spoon two-thirds of the batter into an 8-in. round baking pan coated with cooking spray. Combine the brown sugar and raspberries; sprinkle over batter. Spoon remaining batter over the top. Sprinkle with almonds. 

Bake at 350° for 35-40 minutes or until cake springs back when lightly touched and is golden brown. Cool for 10 minutes before removing from pan to a wire rack. In a small bowl, combine the glaze ingredients. 

Drizzle over coffee cake. Serve warm or at room temperature. 

Yield: 8 servings.

Sunday, February 16, 2014

Block Party Day One

Welcome to the first day of my "Block Party". Every day this week I will be sharing a project I created using Cutting Cafe's Fun with Blocks. I ♥ this file!!!! I used it to create these little L♥VE blocks here and fell in love with them. Ideas just kept coming of what I could do with them, so...."Block Party" was born.

AND... Fun with Blocks is the Cutting Café DT challenge this week, so it was just meant to be.


These blocks were made using the original size of the pattern. The house for the "O" is from House Shaped Card & Envelope file. I shrunk the house down to be 1.5" tall, the same height as the letters.


The "sweet home" was just typed in MSWord and then punched with my bitty tag punch and tied onto the house withe embroidery floss.

I cut the H, M, E & house image four times with white cardstock and then once with designer paper to give it dimension. The blocks were then glued together and tied with yummy chocolate ribbon from May Arts.

With a Block Party, there needs to be a prize, so comment each day to be entered to win the Fun with Blocks Template and Cutting File from Cutting Cafe! I will choose a winner and post next Sunday, the 23rd. Thank you Regina for giving this prize!

Thank you for stopping by and be sure to stop by the Cutting Cafe blog Thursday to comment for a chance to win THREE files of your choice.

Saturday, February 15, 2014

Block Party


I had soooo much fun created my L♥VE blocks using Cutting Cafe's Fun with Blocks file, that I have decided to have a "Block Party" starting tomorrow. Every day from Sunday -Saturday, I will post a different project using Regina's Fun with Blocks cutting file...provided I get them all done. LOL

I already have them started and one finished, so hoping I can get them done. I think they are turning out cute and I'm having so much fun, I keep thinking of more ideas to create with them.

Hippo Birdie

I made this card for my nephew's 4th birthday tomorrow. I paper-pieced the hippo from My Mind's Eye papers using Avery Elle's Hipster-Potamus stamp set and Icon Fill in the Blank die set for the balloons. Tombow's Mono Adhesive Dots make paper-piecing so much easier.


If you haven't commented on the Avery Elle/Tombow hop posts, you still have time. Go here to start.

**Note: while comments are appreciated, commenting on this post does not enter you into the prize. You must comment on my LOVE blocks posted below.

Friday, February 14, 2014

Sweet Treats Hop

Rose are Red. Violets are blue. Sugar is sweet and this hop is too!


We hope you are ready for some Lovely Ideas and Great Prizes this week from Tombow and Avery Elle.

This Sweet Treats Hop is the perfect way to celebrate Valentine’s Day!! If you're here from Yainea's blog, then you’re in the right place,  if not then you may want to start at the beginning

I decorated these fun paper blocks with Avery Elle's Alphas Elle-ments and Icon Fill In The Blank dies.

I used Tombow's new Xtreme Adhesive to form the boxes, Mono Multi Liquid Glue to adhere the boxes together (after they were formed) and Mono Adhesive Dots to glue the letters and other decorative pieces to the boxes.

The letters and heart were cut 3 times with solid cardstock and once with designer paper, then adhered together to give dimension and the look of chipboard. I applied Mono Multi to the heart and gathered a used dryer sheet to create a ruffle to the back (tip I read about from Melissa Phillips)...added a crystal and then glued the heart to the box with the Multi.


To finish it off, I tied Avery Elle's Sea Glass Grosgrain Ribbon around the boxes and tied a bow at the top. (the boxes are a cut file called Fun with Blocks by Cutting Cafe) The size measures 3.25" square. I reduced the size of the original file to fit with the Avery Elle die letters.

I these cut files from Avery Elle! I am wanting to do one that says HOME now using the house die for the "O".  I also received a stamp set that I will be showcasing tomorrow for my nephew's birthday Sunday. Thank you Avery Elle for the fun goodies to play with!

Be sure to comment on all the Designers’ projects for your chance to win a prize you are guaranteed to fall in love with! One lucky winner will get BOTH a $50 Gift certificate from Avery Elle and $50 worth of Tombow Adhesive!


Blog Prizes
To be eligible to win, please comment on each of the designers projects  and don't forget to "Like" the Avery Elle Facebook Page and "Like" the Tombow Facebook Page. If you don’t have a Facebook, still comment on the projects and Tombow will select someone to win a prize just for playing!

Commenting for your chance to win this blog hop prize will end February 16th at Midnight EST. We will announce the Winner on February 17th.

Now it's time to head over to Nina's blog to see her sweet project.

This is the Lineup for our Blog Hop with Avery Elle:

Tombow Blog
Chunyuan Wu
Yainea (Cristina Núñez Regueiro)
                                    Debbie: **you are here**

Monday, February 10, 2014

Pinned It Made It Monday Week 6

For today's post, I am sharing this bread that I made this past week.
Picture of Homemade Bread Recipe
source: Instructables

I did make mine a bit different after reading her instructions. She just mixed the dough and baked it. After reading all the complaints in her comment section, I knew it needed to raise, so let mine raise until double and then baked.

Here it is before it raised

and after baking 

This was okay...very heavy, so don't know that I will make it again, but maybe do the technique with my favorite bread recipe and I like the look as something different.

Friday, February 7, 2014

Frugal Friday 2-7

*had a couple of birthday coffee's to attend. I wanted to give something that I already have, so gave a handmade card and one of these dish cloths that I made last year. I have been giving several of them as gifts and now am down to only 2 left, so need to get more made.

*DH bought a hunting coat and other hunting clothes for very little. He had Cabela gift cards, plus Christmas money, so didn't cost him anything even though they were all discounted and a great bargain.

*I help host a monthly "ladies nite out" and at the last one, it was a movie theme and we had nachos, candy and pop. There were LOTS of chips, taco meat, cheese and pop left over and I was told to take it home. No way DH and I could eat it all, so divided some out for taco salad, nachos and tacos for us and took the rest to youth group and they loved it! We also rarely buy pop, so it was a treat for DH to have a few cans to enjoy.

*3 lb chicken breasts on sale for $4.99. We have had this grilled, in tacos, and on salad and still have over 1/2 left.

*we had more nice weather to dry clothes on the line (a week ago, not this week...WAY to cold and had to use the dryer)

*earned $15 in swagbucks to Amazon and $25 to Walmart

*rec'd a book from Blogging For Books to read and review

* downloaded free books on my kindle from Amazon and CBD

*made 19 dish cloths from cotton yarn I already had (that I had purchased from Hobby Lobby with a 40% off coupon). Will show those on Monday's Pinned It Made It post

*I read a couple of blogs that share frugal accomplishments and many times they post homemade food items. We RARELY eat out, so all our meals are homemade. I share a lot of the new recipes I try on my Monday "Pinned It Made It" posts. So unless it is something that I normally buy and decided to save and make (or didn't have it on hand), I won't be posting that here, BUT...

 I made my own dry onion soup mix to put on a roast. I couldn't tell any difference from the store bought, but was nice to not be filled with preservatives and tasted just as yummy. Carrie from With All That I've Been Given shared this recipe with me. Be sure to stop by her blog to read about her frugal accomplishments.

Dry Onion Soup Mix

3/4 cup instant minced onion
1/3 cup beef bouillon powder
4 teaspoons onion powder
1/4 teaspoon crushed celery seed
1/4 teaspoon sugar

Combine all ingredients and store in an airtight container. About 5 tablespoons of mix are equal to 1 1¼-ounce package.


What are your frugal ways of saving? I would love to hear from you.

Wednesday, February 5, 2014

Cutting Cafe Valentine Window Card

This is my second post for today. Be sure to scroll down for the other one.

This week the Cutting Cafe DT is focusing on just one file:

VALENTINE WINDOW CARD TOPS...TEMPLATES - CUTTING FILES

There are many options in this one file and it was hard to decide which one to use. I went with the trailing hearts. I sized the image to fit the front of a 4.25" x 5.5" card and mounted it onto coordinating pink cardstock.


I tied a mini tag through a couple of openings from the hearts with a sentiment printed from Valentine Mini Words and then added glitter to all the hearts.

I really love how this turned out. It is so sparkly IRL! We would love for you to stop by the Cutting Cafe blog tomorrow and leave a comment. You just might win 3 files of your own choosing!

Tombow Feb Challenge

Hello! I am the hostess this month with the first Tombow challenge of the year. Pantone’s color of the year is Orchid, so with Valentine’s Day nearing, I thought I would combine the two.
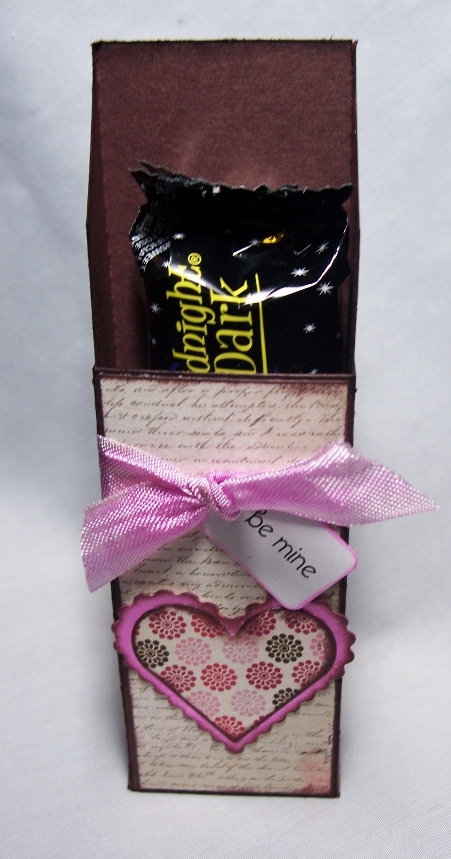
Today I have created a fun candy bar holder using Cutting Cafe’s Pocket Box set and Valentine Mini Words. I used Xtreme Glue Tape to hold the box together since it is super strong. I didn’t have the color of ribbon or cardstock I needed, so colored the ribbon and then colored a piece of white cardstock large enough for me to cut the scalloped heart with the Orchid Dual Brush Pen. This is a great way to get the color you want to match your project.


101_3377 (675x900)

The mini tag is colored around the edges with the Orchid Pen to make it pop and adhered with a Power Tab.
We would love to have you come and play along with us. The challenge is to use the color Orchid and make something Valentine themed. If you have Tombow’s Orchid Dual Brush Pen, we would love to see you use it, but it is not a requisite in order to play along.
Debbie_challenge 3
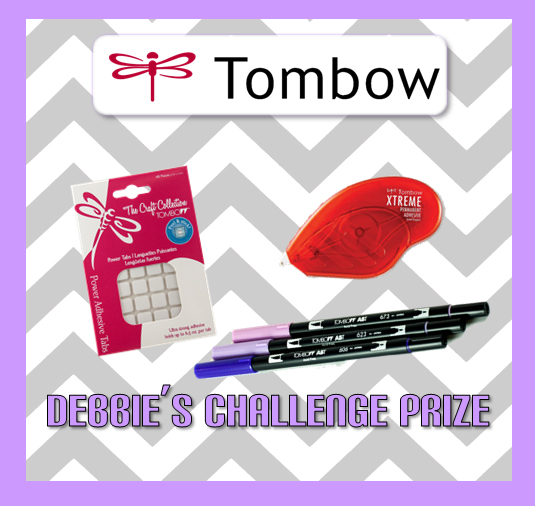
Just upload your project on Tombow's blog by February 13th for a chance to win this prize.


Monday, February 3, 2014

Pinned It Made It Monday Week 5 2014

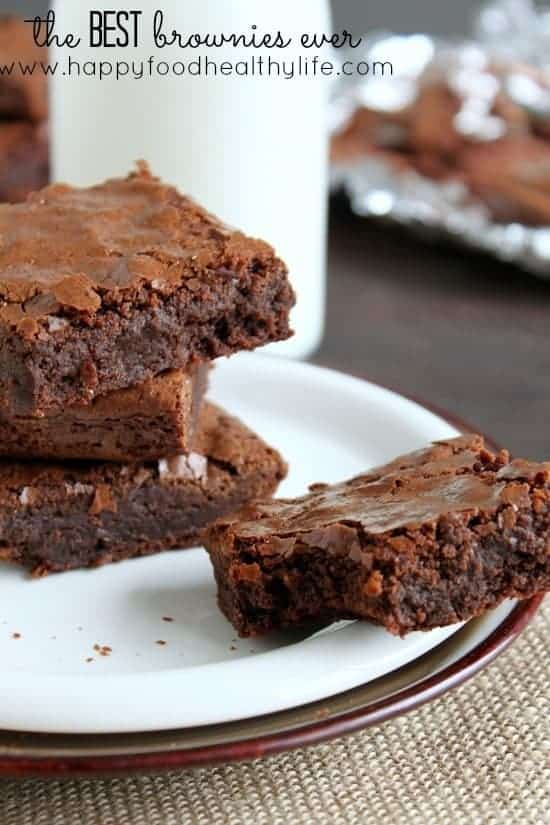
I tried these brownies as they claimed they were the best ever.
{My Interpretation of} The Best Brownies Ever // Happy Food Healthy Life

The recipe says to bake for 45 minutes. I thought this was way too long and am glad I didn't put them in that long. It only took my oven 25 minutes, which is more in line with how long brownies take.


They definitely were good and will be making them again.

tip: Did you know the best way to cut brownies is with a plastic knife. The brownie won't stick to the plastic and you get a nice clean cut every time.

Sunday, February 2, 2014

It. Is. Finished!

When my grandma and grandpa moved from their home to Independent living a few years ago, g'ma gave me a large box filled with yarn. Lots of it, balls left over from afghans that she had made for her kids, grandkids and great grandkids.

At the time, Aaron says "you should make me a blanket with that" and I decided that I would. I used 2 different yarns at a time and knitted until I ran out of yarn. I had just started it a few weeks before g'ma died and told her what I was doing. I was calling it the "ugly blanket" at the time, because it was going to be so wild, but she said she knew it would not be ugly.

That was back in August of 2007 when I started. I would take it out in the winter and do a few rows (it is BIG!) and then put it away. After doing some rearranging a few weeks ago when we bought our new couch and chair, I pulled it out again and decided it WAS getting done and made it one of my "50 things I want to do before I turn 50" projects.

Well, on Wed, I finished it. My goal was to try and get done before Valentines's Day to give it to Aaron and it worked out that he was coming home this weekend and I wanted to see if I could get it done by then and surprise him. He even slept with it last nite (it gets very cold in our house as there is NO insulation).

It's kinda bittersweet that it is done. The whole time I was working on it, I had so many memories of g'ma and I treasure them all. She was one very special lady that I learned so much from and I pray that I can be as wonderful a g'ma as her some day. I wish in more ways than one, that she could have seen this finished.

It's not really that "wavy", I just through it on the floor and tried to get an angle to take pics and then saw later how uneven it looks. Ü