Monday, December 17, 2012

Pin-spired Week 3


Week 3 for Kendra's Pin-spired challenges. Today I have another project and recipe to share with you for this week's Pin-spired challenge. My friend Kendra invited me and others to join her in her "Pin-Spired" Christmas Celebration this month. Kendra is posting something every day from the 1st-21st of December on her blog. Be sure to stop by her blog every day to be inspired.
I was inspired by this post on Pinterest for Christmas Planners. I made some last year and decided to make more again this year.
 
I decided to make one using a pocket folder. Part of the work (the pockets) is already done for you! Here is one I created using an Inky Antics stamp image and lots of Tombow adhesive.
 
 The inside printables are from Cutting Cafe. The receipts item in the last pocket is an envelope I adhered flap closed, covered with designer papers, and then made a flap on one end.
 
I am also linking this up to Country Girl at Home for her Pinned It Made It Monday challenge.
 

Friday, December 14, 2012

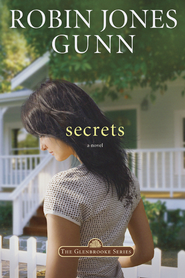
BFB Secrets by Robin Jones Gunn

Another wonderful book from Waterbrook Multnomah Publishing!

This one is the first in a series in her Glenbrooke Series and I've seriously got to read the others!
Secrets, Glenbrooke Series #1   -     
        By: Robin Jones Gunn

The thing I loved about this book is that it flows so nice and you just want to keep turning the pages. In Secrets Jessica is beginning a new life in a new town to start a new job. She meets a handsome firefighter and a jealous new boss who both want to know her secret. I loved this book. You don't learIn Secrets Jessica is beginning a new life in a new town to start a new job. She meets a handsome firefighter and a jealous new boss who both want to know her secret. I loved this book. You don't learn of the secret til near the end and has enough twists and turns to keep you reading til the end! This is the first in a series of 8 and I would definitely be interested in reading the others.n of the secret til near the end and has enough twists and turns to keep you reading til the end!

I received this book for free from WaterBrook Multnomah Publishing Group for this review.

Tuesday, December 11, 2012

The Tombow design team received some lovely goodies from Maya Road to share with you this week. It's been quite awhile since I've posted some cards and I loved the butterfly rubber stamps I received from them.
This card uses Mono Adhesive Permanent, scallop punch, black & aqua ink and designer paper.

For my second card I stamped the outline butterly in charcoal gray and then used Dual Brush Pens to color the "soar" butterfly image. This is less expensive than having several ink pads in different colors.
They are both clean and simple cards and perfect for mailing...no bumps and lumps. Ü I know it is early to be thinking of graduation, but I think the soar theme is perfect for this occasion and I will use these for such.
 
Be sure to stop by the Maya Road Blog to be inspired by their design team.

Monday, December 10, 2012

Pin-spired Week 2


I have another project and recipe to share with you for this week's Pin-spired challenge. My friend Kendra invited me and others to join her in her "Pin-Spired" Christmas Celebration this month. Kendra is posting something every day from the 1st-21st of December on her blog. Be sure to stop by her blog every day to be inspired.

I created these fun snowman tags from this Pinterest post.
Pinned Image
 
I made my tags by cutting 2" circles of kraft cardstock (I think paper grocery sacks would work too) and adhering 2 of them together to make them stronger. Then I just drybrushed some white paint on one side. After that dried I drew in the eyes and nose with markers. I didn't have any jute, so just used red crochet thread. I left the ends long enough to tie onto a gift bag. The back is plain so I can write "to and from".
 
Here is my version of the snowman tags.
 
Now for a super yummy treat! This  Mile High Peanut Butter Pie is the yummiest pie every! It is super easy to make and very light.
 
Here is mine....so good that I need to make it again soon. Just a coupld of differences in mine...I already had a graham cracker crust, so used that instead of the vanilla wafer one the recipe called for and the recipe said to use BAKER'S Semi-Sweet Chocolate to melt for the top, I didn't have any, so just used melted dark chocolate chips.
Pinned Image
 
Here are pictures of mine:
 
here is what it looks like sliced:
 tip: for drizzling on top I added my chips and peanut butter into plastic bags, melted as needed and then snipped a tiny bit off of one corner. Then just squeeze and drizzle over the top. Ü


I am also linking this up to Country Girl at Home for her Pinned It Made It Monday challenge.

Monday, December 3, 2012

Pin-Spired!


I am excited to share a couple of things with you today. First I was invited by my friend Kendra to join her in her "Pin-Spired" Christmas Celebration this month. Kendra is posting something every day from the 1st-21st of December on her blog and some of her friends are joining her along the way. Be sure to stop by her blog every day to be inspired.

I have been pinning on Pinterest for over a year and I have a BUNCH of boards and pins and not enough time to put them all to use. Ü It IS addictive, but have tried several of my pins esp the recipes. About 3 weeks ago, I started pinning on Monday some Pinned It, Made It projects and will continue to do that as time allows.

Now on to the project I am sharing. Over Thanksgiving break, Benjamin and his girlfriend were able to spend the break with us and Saturday, Kassy and I made some Joy blocks.

Here is the Pinterest post that I got my inspiration from.
Joy Christmas Sign Word Blocks


Here is mine. I know mine looks nothing like the one above, but that's kinda how my mind works sometimes. 


I had a bunch of scrap wood from way back when I used to teach wood project classes and was inspired  to make some Joy blocks as Christmas gifts. Kassy made 2 sets, one for her and her mom and I made 3, but am thinking I now need to make more.

Benjamin was a sweety and cut them to size for us and sanded them. We then painted them with FREE tinted (any color we wanted) paint from Ace Hardware. (I don't know if this is just a local thing or not, but check your Ace Hardware. The promotion is a free quart of paint colored any color you want. I just took in a sheet of designer paper and chose a color one shade darker. I got my paint in Broken Bow in case anyone local is reading this)

Then we chose some fun NEW designer papers by Fancy Pants from their Blissful Blizzard line (except for the carrot nose and it is from Hopscotch. The letters and snowman were cut with my Cricut. Next, we adhered the letters and snowman on the background papers with Tombow's Mono Adhesive Dots. After the paint was dry, we adhered the panels to the blocks with Tombow's Mono Aqua Liquid Glue. We let that dry and then painted over the top with the glue as well to seal it.

After everything was good and dry we added the button with a Power Tab.

I am also linking this up to Country Girl at Home for her Pinned It Made It Monday challenge.