Monday, December 3, 2012

Pin-Spired!


I am excited to share a couple of things with you today. First I was invited by my friend Kendra to join her in her "Pin-Spired" Christmas Celebration this month. Kendra is posting something every day from the 1st-21st of December on her blog and some of her friends are joining her along the way. Be sure to stop by her blog every day to be inspired.

I have been pinning on Pinterest for over a year and I have a BUNCH of boards and pins and not enough time to put them all to use. Ü It IS addictive, but have tried several of my pins esp the recipes. About 3 weeks ago, I started pinning on Monday some Pinned It, Made It projects and will continue to do that as time allows.

Now on to the project I am sharing. Over Thanksgiving break, Benjamin and his girlfriend were able to spend the break with us and Saturday, Kassy and I made some Joy blocks.

Here is the Pinterest post that I got my inspiration from.
Joy Christmas Sign Word Blocks


Here is mine. I know mine looks nothing like the one above, but that's kinda how my mind works sometimes. 


I had a bunch of scrap wood from way back when I used to teach wood project classes and was inspired  to make some Joy blocks as Christmas gifts. Kassy made 2 sets, one for her and her mom and I made 3, but am thinking I now need to make more.

Benjamin was a sweety and cut them to size for us and sanded them. We then painted them with FREE tinted (any color we wanted) paint from Ace Hardware. (I don't know if this is just a local thing or not, but check your Ace Hardware. The promotion is a free quart of paint colored any color you want. I just took in a sheet of designer paper and chose a color one shade darker. I got my paint in Broken Bow in case anyone local is reading this)

Then we chose some fun NEW designer papers by Fancy Pants from their Blissful Blizzard line (except for the carrot nose and it is from Hopscotch. The letters and snowman were cut with my Cricut. Next, we adhered the letters and snowman on the background papers with Tombow's Mono Adhesive Dots. After the paint was dry, we adhered the panels to the blocks with Tombow's Mono Aqua Liquid Glue. We let that dry and then painted over the top with the glue as well to seal it.

After everything was good and dry we added the button with a Power Tab.

I am also linking this up to Country Girl at Home for her Pinned It Made It Monday challenge.

Tuesday, November 13, 2012

Christmas Planner

With Thanksgiving right around the corner and shopping for the holidays, I created this Christmas Planner to keep everything organized as I create/buy gifts and as well as keep track of card sending, food and etc.

I started out with a manilla file folder and accordian folded it. Then I folded the bottom up 4″ and started decorating with designer papers by Fancy Pants, adhering with a Mono Glue Stick.

I made a tab that adheres to the back of the folder with Power Tabs and to the front with a Fastener Tab.

The image is colored with Irojiten Pencils and then shaded with Dual Brush Pens. I love using the pens over the pencils.

Here is a peek at the inside: You can get printables from Organized Christmas to put inside your pockets.

Monday, November 12, 2012

Cheeseburger Soup

I have another yummy recipe to share with your for Pinned It, Made It! Monday.
We had freezing temps this weekend and it was perfect weather for soups. I love make a large pot, so there are leftovers for my lunches for work. I also like finding recipes that we like that uses the crockpot.
 
This is cheeseburger soup. I changed it up a bit as I just used what I had on hand. I live out in the country, so am not able to run to the store for something I may not have on hand. It called for carrot and celery. I didn't have carrots, but will try it again with them and for the celery, I had celery flakes, so added about a tablespoon of that. I also didn't have chicken broth, so made up a broth with boullion. Otherwise the rest is pretty much as the recipe called for.
 
I tried to take a picture of mine, but am having problems with my camera. This is another winner and is nice to add to my soup recipes.

I am linking up to countrygirlathome

Tuesday, November 6, 2012

J*O*Y

I know Thanksgiving is our next holiday, but I don’t have any glittery ideas for Thanksgiving and this month on Tombow we are showcasing ideas using glitter from Art Institute.

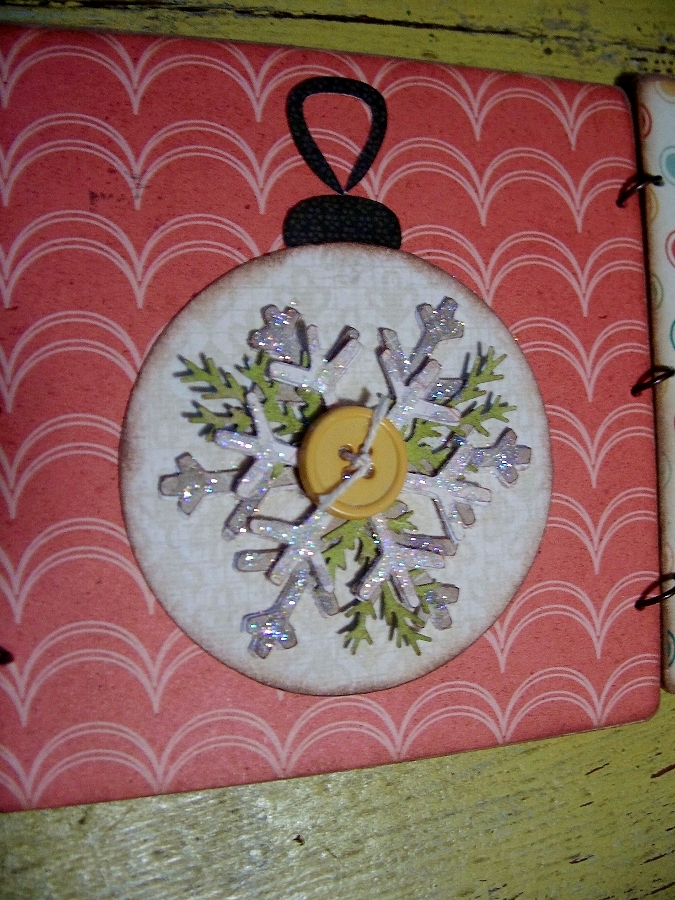
This JOY project is created with chipboard coasters. I cut designer paper to fit the front and back of the coasters and adhered them with a Mono Glue Stick.


I then cut shapes & letters with my Cricut to spell out J*O*Y and added fun embellishments. The glitter (crystal) was added to the snowflakes with Mono Aqua Liquid Glue. The letters were cut 3 times with white cardstock and once with designer paper, then along with the other shapes was adhered together with Mono Adhesive Dots.


I used a Power Tab (that had been cut into fourths) to adhere the buttons.

These make nice gifts and I hope I inspired you to give them a try.

Be sure to stop by Tombow and the Art Institute blog for more inspiration. Thank you Art Institute for the lovely pkg of glitters!

Monday, November 5, 2012

Pinned it Made it! Monday

Welcome back to another Pinned it, Made it! Monday.
 
Last week for our monthly "ladies nite out", I made Italian Bread, traditional lasagne, Chicken Ranch Lasagne and Rosemary Olive Oil Bread. The rosemary bread is the only one I got a picture of. The first two were not from Pinterest and the second two were.
 
Here is a picture of the Chicken Ranch Lasagne from Pinterest (a huge hit with the ladies and my family). Mine looked pretty much like this.
chicken lasagna 6 450
 
The rosemary bread was okay. Most liked it, my family not so much, so won't be making it again. The blog says it is like Olive Garden's.
Pinned Image
source: ahintofhoney
 
here is a picture of mine...I doubled the recipe and made two loaves and didn't add the rosemary to the top
 
I am linking up to countrygirlathome

Friday, November 2, 2012

BFB Christmas in Apple Ridge

If you have been following my BFB reviews at all, you know how much I love reading about the Amish. I am excited to have been able to review a book from one of my favorite Amish story writers Cindy Woodsmall.
Christmas in Apple Ridge: Three-in-One Collection: The Sound of Sleigh Bells, The Christmas Singing, NEW! The Dawn of Christmas  -     
        By: Cindy Woodsmall

Christmas in Apple Ridge is a 3-in1 collection. You can read the first chapter here. I had read one of the stories "The Christmas Singing" (you can read my review of that story here), but the other 2 were new to me and I loved them.

The other two stories are The Sound of Sleigh Bells and The Dawn of Christmas.

In The Sound of Sleigh Bells Beth Hertzler is struggling with a tragedy that happened over a year ago. It isn't until she finds a carved winter scene that she finds healing. When she meets the artist she finds that they both have lots of things in common and both have healing to go through.

In The Dawn of Christmas Sadie has been gone from home with her family's blessing because of a broken relationship. Her family decides it is time for her to come home, but she is not ready to settle down. She has a lot of trust issues. She meets Levi, who too has major trust issues and they become friends.

Both of these stories were wonderful and I love reading anything by Cindy Woodsmall!

I received this book for free from WaterBrook Multnomah Publishing Group for this review.

Wednesday, October 31, 2012

Faith

For ABC week on Tombow, I have a great gift idea for you.


I used scraps of designer paper and inked the edges and lined them up on some white cardstock that fit my frame and adhered with Mono Adhesive Permanent.

I stained wood letters from Walnut Hollow and adhered to the designer paper with Mono Multi Liquid Glue.

This was quick and easy to make and you could spell out any word for any occasion and a great way to use up your scraps.

Monday, October 29, 2012

Pinned It Made It Monday


I have yummy and not so yummy pins to share with you today. First the not so yummy. I made these Glazed Donut Muffins this weekend and they didn't taste anything like a donut nor were they moist. They were very dry and I made them exactly like it said, but just used some frosting I had left over instead of the icing it said to use.

Pinned Image

They look good, but just didn't taste good. Took this off my Pinterest board.

This recipe however is delicious!! I have made it twice and it was super yummy both times.
Pinned Image


The pork just falls apart. Here it is after cooking in the crockpot and here is a view after adding BBQ sauce.

I am linking up to countrygirlathome

Monday, October 22, 2012

Pinned It Made It Monday

I found country girl at home's blog while browsing one day and saw she hosts a Pinned It/Made It Monday and thought what a great idea! I ♥ Pinterest! I have MANY boards and pins and really do make several things (though not NEARLY what I actually pin! LOL).
 
 
I just made Buttermilk Chocolate Scones and took a picture as I took them out of the oven. I forgot to make the cut marks before baking, but it cut fine and was still very yummy. Perfect treat for a very chilly day.
 
source: skinnytaste.com
 
Here is a view of mine:
 
best served warm and with a glass of milk Ü
 
If you would like to follow me on pinterest, here is my link: http://pinterest.com/debbiedeefisher/
 
I am linking up to countrygirlathome


Inky Christmas Boxes

Here are a couple of boxes I made for CHA this summer.

Tuesday, October 16, 2012

Corner Bookmark

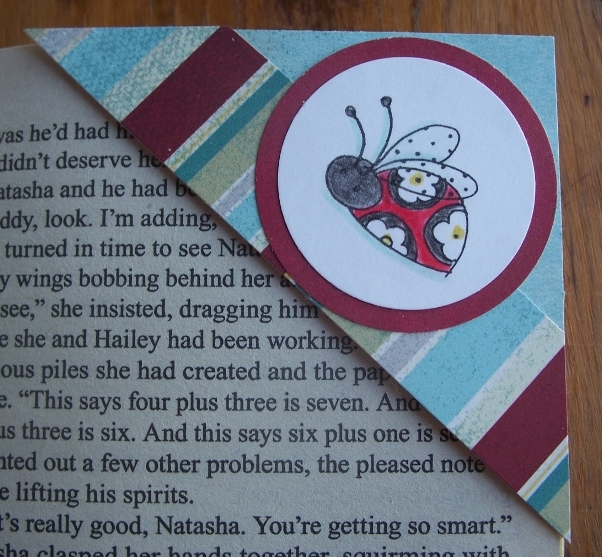
Today I have a fun and easy and “green” project to share with you. This corner bookmark is made from recycling all those envelopes you get in the mail and fun scraps from Fancy Pants.


I cut the corners (mine measured 2″ from each corner) and then covered with designer papers (a great way to use up those scraps) and a stamped image.

Here I covered the front of the envelope corner (back is covered also for added strength) with Mono Adhesive Permanent.


Added a 1/2″ strip for contrast.


I colored a stamped image with Irojiten Pencils, punched with a circle paper punch, layered onto coordinating paper and adhered with Mono Adhesive Permanent.

To use, open envelope corner and insert on the page you are on in your book to keep your place for you. These are so fun and easy to make and a great project to do with your children.

I hope you like this project and will give it a try. If you do, be sure to post a link to your creation in the comment box.

Monday, October 8, 2012

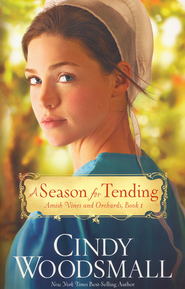
BFB A Season for Tending


A Season for Tending, Amish Vines and Orchards Series #1   -     
        By: Cindy Woodsmall
    
Another wonderful book by Cindy Woodsmall. I believe I have read all of her books to date. This is the first in a series and is an Amish story about Rhoda. Rhoda has her own little business selling items from her herb and fruit garden.

Unfortunately, she also has a gift of “intuition” that is not readily accepted by the Amish and causes lots of hardships in her life. Mix that in with her guilty feelings that she has over her sister’s death, her people not accepting her as “normal” and hardships the family is going through because of her "intuitions" and you have a story that keeps  you wanting to turn the page.

The worst thing about this book is having to wait until spring for the next book in the series! I did not want to put this down.

Here is a peek at the first chapter.

I received this book for free from WaterBrook Multnomah Publishing Group for this review.

Tuesday, October 2, 2012

Designer Purse

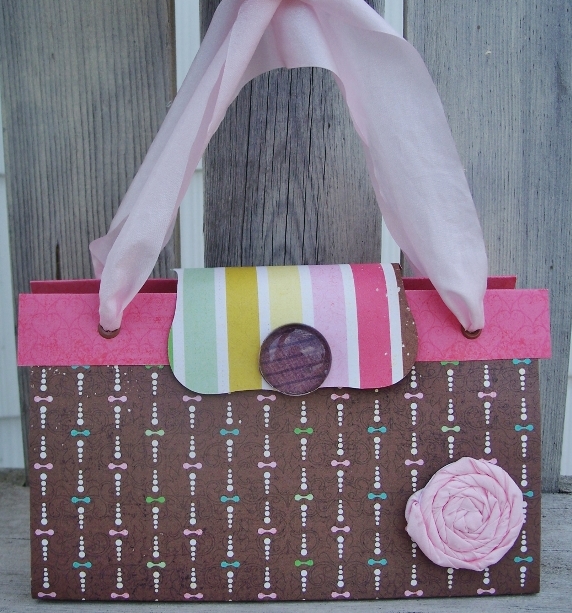
Remember THIS paper/fabric purse I made earlier? I taught how to do these (minus the fabric, paper only) at CHA this summer. They were a hit! I had several designer paper combos, so they could choose the color they wanted to create their own fun designer bags.


The purse tutorial on how to make these was found on YouTube. For this particular style, I adhered a clear bubble with Mono Aqua Glue to a punched designer paper circle, then adhered that to a cut "flap" that is adhered to the back of the purse with Power Tabs and to the front with a Fastener Tab.

The flower was made using May Arts ribbon and Mono Multi Liquid Glue. You can click HERE to see how I made the flower.

I also used Mono Adhesive Power Bond for the pink designer strips at the top of the purse. Lots of adhesives were used to make this super easy to create.

Saturday, September 22, 2012

Inky Antics/Action Wobbles Co-Hop

Mummys wobble but they don't fall down. Ü

Welcome to Inky’s Action Wobbles Co-Hop! We’re excited that the Inky Antics and Action Wobbles Design Teams are hopping together this month. If you have been following along you have just come from Tricia’s blog. If not, please make sure to start at the beginning at the Inky Antic's blog so as not to miss out. Ü
I used 10991SC Frankie and Mummy Maker Clear Set & 10678D Mummy's Favorite (mummy riddle) drawn by artist Tammy DeYoung, along with an Action Wobbles spring to create this project. The Mummy Maker set was designed to use with Inky Antics Triangle Treat Box stamp template, but I just stamped the mummy face onto watercolor paper, colored and then punched with a circle punch.
I layered the face onto patterned paper and then the wobble action behind that. This is then centered onto another circle on the paper bag front. The black polka dot paper is by Fancy Pants and the rest from a Halloween paper pack I got on sale at Hobby Lobby.
Here is a quick video showing you how the mummy wobbles.

You can find the Action Wobbles on the main Inky website here, and the stamps used in this hop are shown here.

The blog hop starts today and ends tomorrow at midnight. Please visit each DT members’ blog to view their projects and leave a comment for each designer. The more you comment, the better your chances are to win. (Limit one comment per blog, please). Inky Antics will be drawing THREE people’s names at random, who will each receive an Inky Halloween clear set and a dozen Action Wobbles. The winners’ names will be announced on the Inky Antics blog on Monday morning, so remember to stop back and see if you’ve won. The AW folks will also be giving away even more Action Wobbles, so there will be lots of prizes all around!

Your next stop will be Kate’s blog. Thanks for wobbling with us!
Here is the line up in case one of the bloggers isn't up yet.


Main blog for Inky Antics - http://inkyanticsrubberstamps.blogspot.com/

Main blog for Action Wobbles - http://www.action-wobbles.com


Debbie - http://debbiedee.blogspot.com/ YOU ARE HERE Ü


Tuesday, September 18, 2012

Calendar Wallhanging

One of the projects for CHA that I created for a Make 'n Take was this calendar wallhanging. It went fairly quickly, since I did alot of the prestamping ahead of time.

The background is cut from cereal/cracker boxes and then covered with patterned paper. Decorative cardstock “Indigo Bleu” & “Spring Jubilee” collections from Pink Paislee. Rubber stamp from Purple Onion Designs, calendars from Taylored Expressions. The fence is a svg. file I found online.

We used Mono Glue Stick to adhere designer paper to the front and back of the "chipboard" and Mono Adhesive Dots, Roller to adhere all the stamped and cut pieces.

To finish it off, punch two holes and add eyelets and May Arts ribbon to hang.

Wednesday, September 12, 2012

Burlap Pumpkin

Today we have had much cooler weather and it definitely feels like fall in the air. I want to share with you a fun project I created last weekend.

I have seen painted burlap items over the last couple of years and have kept it in the back of my head that I would like to do this "some day". Well that "day" had come! Saturday & Sunday were beautiful days and I decided it was time to make something new for fall. I was inspired by this project I had seen on Pinterest.

For my pumpkin, I folded some computer paper in half (this is BIG computer paper) and just took a pair of scissors and cut what looked like 1/2 a pumpkin. I opened it up and liked what I saw, so didn't do any other adjustments.

I pinned the pattern to 2 pieces of burlap I have had for awhile now (probably a couple of years Ü) and cut out the shape and then took outside to spray paint orange. I hand painted the stem and it is REALLY stiff, so am glad I didn't hand paint the whole pumpkin (it is stiffer, but not as stiff as the stem). I also hand painted the polka dots.


I let that dry and then sewed the edges together and VERY lightly stuffed it. I added the bow made with May Arts ribbon with a Tombow Power Tab. I love that the ribbon was wired to give the bow character. To the back I added a pop can top with a Power Tab to hang my pumpkin outside the house.

Now I think I need to make another one, but this one with chevron design. Ü

**entering this in the Crafty Friends Challenge #7

Tuesday, September 11, 2012

Halloween Treat Cup


We are partnering with May Arts  this week on Tombow. I LOVE their ribbon! It is so gorgeous and so much fun to work with. This was a fun project for me to create. Other than needing to use  May Arts ribbon and Tombow products, we were free to create whatever we wanted.
 
I had planned to alter an envelope, went to get one and saw a peat pot sitting on the shelf just calling to be altered and just went from there. I didn't have any plan of what I was going to do, so it was fun to just create as it came to me.
 
First I spray painted the peat pot black and while that was drying, painted white polka dots on some crepe paper streamers using the cap of Gamsol (it was the perfect size and stitting on the table in front of me Ü).
 

Now while that dries, the black paint has dried on the peat pot. Add a bead of Mono Multi Liquid Glue around the top edge.

Now this takes a little while to dry, so go mix up a batch of cookies. Ü When it dries it will be clear-ish. I forgot to take a picture of that. Adhere May Arts ribbon handle. The crepe paper should be dry by now, so just center it over the glue and pinch pleat it as you go all around the edge.

I used Mono Adhesive Dot, Roller to adhere the lace to the center of the streamer. The May Arts lace was white and I colored it with a permanent marker to make it black. To adhere the tiny May Arts tiny ric rac I used the Mono Multi letting it dry first and then adding it to the center of the lace.

Now it was cute like that, but I thought it needed a little something extra, so tied a bunch of orange buttons with black embroider floss and added them with Power Tabs cut in fourths.

Be sure to stop by the May Arts blog to see the fun creations by their Design Team. Thank you May Arts for the lovely ribbon you sent! I have more goodies I created to share with you this week if you would like to stop by.

**entering this in the Crafty Friends Challenge #7

Monday, September 10, 2012

OCL Freebie and Challenge

Our Craft Lounge's 133th challenge is to use an OCL image. Don't have one? Well then it's your lucky day as they have posted a digital freebie hot air balloon for you to use called Love Floats. (I helped name it Ü).

Just stop by the blog to pick it up and play along in our challenge. We would love to see what you do with the image.
I decided to paper piece mine. I love paper piecing with digi images. I just print as many images as I need different papers on regular paper, then use removable adhesive to tape all the different patterned papers I need to that sheet and run it back thru the printer.

Mom & Dad's anniversary is Saturday, so I created the Happy Anniversary on the computer and added it to the card.

Play along with us this week and be entered to WIN a $20 gift certificate from Our Craft Lounge. You have until 11:59pm Thursday, September 13th to enter. Participate as many times as you like! A random winner will be selected and posted here on the OCL blog at the beginning of next month. Here are the rules: use any stamps that you wish – get BONUS POINTS when you use OCL stamps! Link to your card/project at the bottom of this post using the link tool provided – **be sure to link DIRECTLY to your challenge card – not a general blog or gallery link & add the appropriate photo. Use the challenge as your basis – do whatever inspires you, but please base it on the challenge. If you upload to SCS, please use the Keyword OCL133. We can’t wait to see what you CREATE!


************** SALE *************** SALE ****************** SALE ****************
SALE ALERT!!!! Starts today on the OCL site.
Here are the details:
  • On orders $25 or more (before tax & shipping) you’ll get 25% off.
  • Sale ends Monday, September 10, 2012
  • No coupon code required ~ it should calculate it automatically at checkout.
  • Not applicable to wholesale orders or items that are out of stock.

Thursday, September 6, 2012

Snowy's Woodland Pals

I'm back today with a couple more Inky projects for you. These use 11137MC Snowy's Woodland Pals Clear Stamp Set and X2-2940 Square Box Template stamp.

Tombow adhesive is perfect for these boxes.

Tuesday, September 4, 2012

BFB Twice a Bride

YAY! The next book in Mona Hodgson's series Twice a Bride in The Sinclair Sisters of Cripple Creek Series . I have loved the books in this series and this one is a wonderful story as well. Here is a fun trailer to view as well.

I love reading historical novels and this one was no exception. It takes place in Cripple Creek and this time the story is about Willow, Tucker Raines sister who would much rather paint than sell ice boxes. Her sister in law (Tucker's wife) has a miscarriage and her life takes a turn. She meets a photographer needing help and the story continues in such a fun fashion that is true to Mona's writing that you just don't want to put the book down until the last page and even then it leaves you wanting to read more about the family even though this is the last of the series.

I received this book for free from WaterBrook Multnomah Publishing Group for this review.

Paperclip Bookmark

With some scraps, punches, buttons, and Tombow adhesives you can make some cute paperclip bookmarks. Try making mini ones as well.

Apply Power Tab to the back of aqua circle and adhere paperclip in tab.


Adhere large Foam Tab inside paperclip and 4 mini Foam Tabs around outside paperclip. Peel off paper from Foam Tabs and adhere second circle lining them up.


Apply Stamp Runner Permanent Adhesive to flower and small center circle and adhere to aqua circle.

Cut Power Tab in fourths and apply one fourth to back of button. Adhere to flower center.


Monday, September 3, 2012

Labor Day and Inky Christmas

Have a Safe Labor Day_poster, 3 flags in bucket w, flowers
 
Strange combo I know, but I wanted to wish you all a very Happy & Safe Labor Day weekend and also share a couple of Inky Christmas projects with you.
 
For my Inky Antics projects I used 11136MC Rejoicing Angels and 111358MC Heavenly Friends Clear Sets designed by Tammy DeYoung as well as 10189X Tall Bag Template stamp for both.
the little flaps are adhered with Tombow's Fastener Tabs.