This is my second post today, so be sure to scroll down to see sneak peeks from OurCraftLounge.
***ETA: Here is the link to all the giveaways.
This week on Cutting Cafe, the Design Team gets to give away one of their favorite Cutting Cafe files. Oh my!!! This was so hard to choose just one! The set I am choosing is a newer one and it is HALLOWEEN - FALL MILK CARTON...TEMPLATE - CUTTING FILE. Here is the carton I created using this file:
These are so much fun to create! Regina also has a plain box, and assorted cut out set and a Christmas set! Be sure to stop by the blog to see them all.
I also used Autumn Days Printable Set for the tag.
To win the Halloween-Fall Milk Carton file all you have to do is leave a comment and let me know your favorite fall memory, food or treat. You have until Saturday (Sept 3) noon CST. I will draw a name and post a winner later that afternoon. You must leave your e-mail addy so that I have a way to contact you.
To see the other DT's creations and what they are giving away, go to my sidebar under Cutting Cafe DT and click on the links.
Wednesday, August 31, 2011
OCL Sneak Peek
Today is the first day of OurCraftLounge's Sneak Peeks of half of their new releases.
The image I am showing today is Fall Scarecrow. It is one of their new singles sets. The sets come with one large image and a couple smaller coordinating images. This one comes with two sentiments that you can see by clicking on the link.
I created a gift bag made from a smaller size lunch sack that I cut down. It measures 4.25" x 5.5". Paper are by My Mind's Eye and bag "handles" are May Arts. The loopy jute is wired, so it was perfect for handles.
Be sure to stop by OCL blog today as well as tomorrow and leave comments on each post. These comments will count toward Friday's Blog Hop give-a-ways. I will have another project tomorrow using another new set.
Tuesday, August 30, 2011
Surprise Me
This week's Tombow challenge is 'Surprise Me' which basically means anything goes. Ü
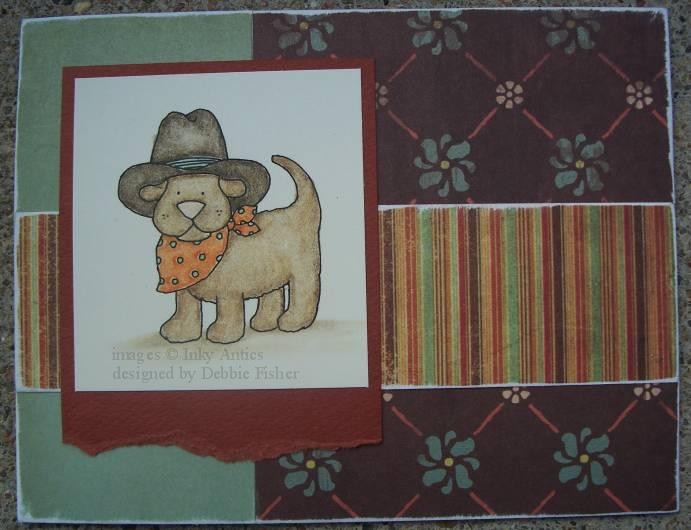
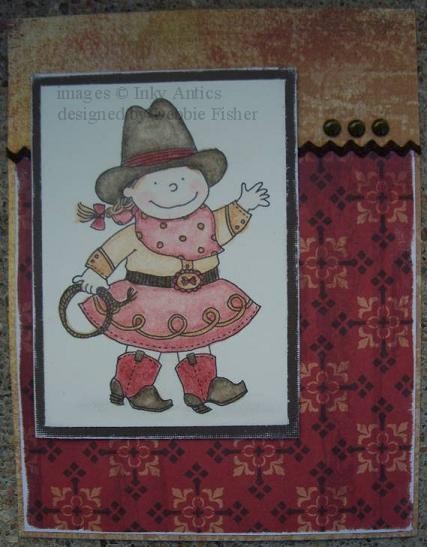
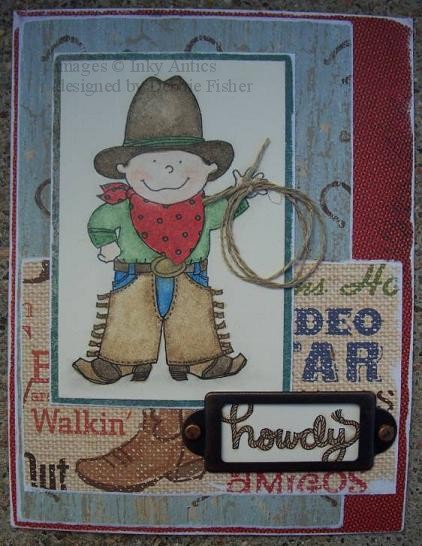
I have three cards to share with you that use Inky Antics' images, Tombow's Irojiten Colored Pencils and Mono Adhesive Permanent.
First let me introduce you to Cooper (10596F):

Next we have Casey (10647J):

And my last card uses Tex (10643J) and Howdy (10544D). For this card I also used Mono Multi Liquid Glue for the jute lasso.

Thanks for stopping by. I hope you enjoyed these western cards.
Saturday, August 27, 2011
Sundae for a Hot Day
We've been having hot weather lately and a sundae would be a wonderful cool treat. This cute image is from Inky Antics 11045MC Sundae Birdy HoneyPOP Clear Stamp Set.
For the inside I used Ivory, Light Blue, and Red Honeycomb paper.
Thanks for stopping by and I hope you have a cool day or at least enjoy a cool treat if you are having hot weather.
For the inside I used Ivory, Light Blue, and Red Honeycomb paper.
Thanks for stopping by and I hope you have a cool day or at least enjoy a cool treat if you are having hot weather.
Friday, August 26, 2011
OCL/May Arts Swap Week Day 5
I am soooo ready for cooler weather and fall to make its appearance! Tuesday it was 104* and that is just too hot, esp when the air conditioners don't work in the school. So with fall on my mind, I used Autumn Garden stamp set and May Arts KB46 Gingham Ribbon for my card today.
Using a Making Memories safety pin, I cut "Thankful for you" with Nestibilities tag die and attached it to the knot in the ribbon.
Today is the last day of our swap week with May Arts, so don't forget to stop by the OCL Blog & May Arts blogs for more inspiration and chances to win fun prizes.
Using a Making Memories safety pin, I cut "Thankful for you" with Nestibilities tag die and attached it to the knot in the ribbon.
Today is the last day of our swap week with May Arts, so don't forget to stop by the OCL Blog & May Arts blogs for more inspiration and chances to win fun prizes.
Each day, leave comments…
1. 1) on the OCL Blog,
2. 2) on each designer’s blog (from the list of those playing along that day), and
3. 3) on our Facebook page.
Thursday, August 25, 2011
Take a Bath
Today is day four of OCL/May Arts Swap Week! Have you been checking out all the inspiration on both the OCL blog and May Arts blog? Be sure to stop by and comment for fun prizes.
May Arts sent a WONDERFUL package of lots of ribbon and one of my favorites is their Sheer Tinsel Edge Ribbon. So pretty IRL!!!! The edges are so sparkly. I thought this ribbon was perfect for OCL's Pretty and Pampered stamp set. The paper is all by My Mind's Eye.
Don't forget to stop by the OCL Blog & May Arts blogs for more inspiration and chances to win fun prizes.
Each day, leave comments…
1.1) on the OCL Blog,
2.2) on each designer’s blog (from the list of those playing along that day), and
3.3) on our Facebook page.
Wednesday, August 24, 2011
Cupcake Day Wishes
Hello! Welcome back to day 3 of OCL/May Arts Swap Week. The card I made today uses an image from Big Birthday Wishes stamp set. The May Arts ribbon is DD14 Grosgrain Polka Dot Ribbon. The dots are flocked! It is soooo cool!
I added a line of Tombow's Mono Multi Liquid Glue behind the stamped image piece and let "dry" until tacky and then hand gathered the ribbon into the glue by pinching and scrunching the ribbon. I used Tombow's Foam Tabs to raise up the stamped panel.
I made a bow with the ribbon and added a hand crocheted flower and Basic Grey brad to the center.
Don't forget to stop by the OCL Blog & May Arts blogs for more inspiration and chances to win fun prizes.
Tuesday, August 23, 2011
M & M Dispenser
**If you are looking for the Inky Antics blog hop, scroll down as this is my second post today.
This week Regina challenged the Cutting Cafe DT to use her gumball images for our projects. (YAY! I am on the team for another round. Be sure to stop by the blog to welcome the new members as well as the older ones back).
My MIL has an antique M & M dispenser that takes pennies on her bean counter in the kitchen. There is a box full of pennies right by it and kids young and old alike enjoy the M & M's when they visit. This is where my inspiration came from. As soon as I saw the gumball machine I knew I would be making mine filled with M & M's. Ü
I used the Gumball Machine Card Template and cut with my Cricut. Super easy that way! It also comes in PDF in case you don't have a cutting machine. I embossed the silver parts to make it look old.
The " M & M's" were just punched and then I wrote and "m" on each one with my white gel pen.
**Regina is having a contest on the blog here. Be sure to go and play!
Happy Birthday Benjamin!!
My oldest is 19 today. I can remember his birth as if it were yesterday. He is celebrating with his college friends tonite, one of them being the same age and 5 minutes younger than him. So Happy Birthday Lacey too! (doc delivered Benjamin and nurse came in saying Lacey was about to be born)
We celebrated his birthday Friday since he left Saturday to go back to school (5 hrs away :( ) The cake is coconut cream...his request and very yummy!
We celebrated his birthday Friday since he left Saturday to go back to school (5 hrs away :( ) The cake is coconut cream...his request and very yummy!
Stamping Spaces Blog Hop
Welcome to the Inky “Stamping Spaces” Blog Hop! If you’ve come from Michelle’s blog, you are in the right spot. If not, you will want to start HERE at the beginning. Here is where I create my projects...

In the 3 white photo
boxes I have my ribbon wrapped on 3.5" x 7" chipboard. One box is for pink, red,
yellow, orange; one for blue, green and purple and the 3rd for black, brown, and
white
On the bottom shelf
between the boxes are 2 boxcar boxes that hold my ink refills. You can buy these
at Wal-Mart. You can see how I label them on the outside.
North wall: Where I sit
and do most of my stamping, I like that I can look out in our back yard. On the
first shelf in the white/clear box is my SU! ink pads, bottom drawer holds SU!
buttons and brads and needles. on the bottom is my 12 x 12 paper
Go HERE if you would like to see more photos of my room.
The blog hop starts today and ends on Sunday, August 28th at midnight Central time. Please visit each DT members’ blog to view their stamping space and leave a comment for each designer. The more you comment, the better your chances are to win. (Limit one comment per blog, please). One person’s name will be drawn at random to receive a fun Inky prize pack. The winner’s name will be announced on the Inky Antics blog next Monday, so remember to stop back and see if you’ve won.
Your next stop will be Keri’s blog.
Monday, August 22, 2011
OCL/May Arts Swap Week
Welcome to the OCL/May Arts Swap Week!
We are so excited to announce that Our Craft Lounge and May Arts are teaming up this week to show you some amazing products from both companies! Wait until you see all the wonderful projects we have to share with you this week. Each day we will post a few samples here on the OCL Blog & May Arts will be doing the same on their blog ~ http://www.mayarts.com/blog/. In addition, we will post a list of designers who have projects to share as well. Now don’t forget to leave some love everywhere each and every day this week because there will be lots of blog candy flying around this week {details below}!
The card I created for today uses OCL's Friendly Flowers stamp set and May Arts' Crocheted Velvet Center in olive.
The card I created for today uses OCL's Friendly Flowers stamp set and May Arts' Crocheted Velvet Center in olive.
Thanks so much to Bethney and May Arts for sending our designers such FANTASTIC ribbons and trims to play with this week!
Now for some blog candy! May Arts sent us extra spools of YUMMY ribbon to share with all of you! WOOHOOO! So we’ll have 3 BIG prizes to give away this Friday, August 22nd! You have lots of ways to enter EVERY SINGLE DAY this week + one BONUS entry!
Each day, leave comments…
1. 1. on the OCL Blog,
2. 2. on each designer’s blog (from the list of those playing along that day), and
3. 3. on our Facebook page.
BONUS ENTRY: If you “LIKE” us on Facebook, you’ll get a bonus entry (as long as you tell us you did it).
AND… don’t forget to check out the May Arts Blog for chances to win some great OCL stamp sets too.
Sunday, August 21, 2011
Back to School Survival Kits
Here are the rest of the kits I made for my youth group girls using OurCraftLounge's Build a Bouquet set.
Thursday, August 18, 2011
Back to School Inspiration
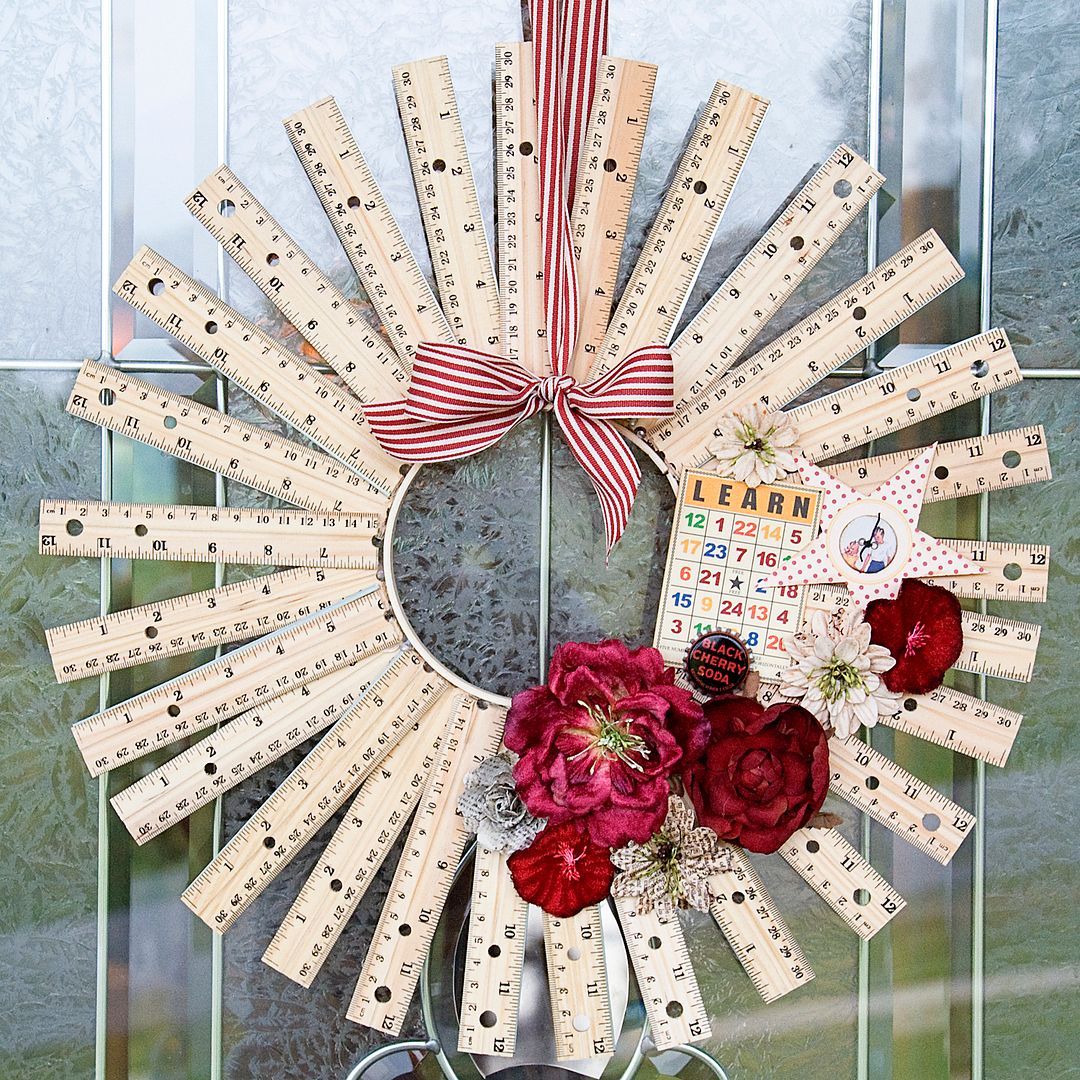
School starts today for us and I found several fun idea to "decorate" or make gifts for teachers. Just click on the titles to take to you to the sites. Some have tutorials.
Ruler Wreath:

"Taffy" Erasers:

Back to School Party ideas:

Pencil Cake Pops

Apple Cake Pops:

Ruler Wreath:

"Taffy" Erasers:

Back to School Party ideas:

Pencil Cake Pops

Apple Cake Pops:

Wednesday, August 17, 2011
Silhouttes
Regina challenged the DT to use any image from her Silhouettes line of digital images. I chose the house image and added the computer generated sentiment. The silhouette images make me think of clean and simple for some reason, so I went with that for the design of my card.
Papers are My Mind's Eye, pompom ribbon was a small piece in my stash and brads are some that a friend sent me.
Stop by the Cutting Cafe blog to see the cards the DT created using the Silhouette set.
Papers are My Mind's Eye, pompom ribbon was a small piece in my stash and brads are some that a friend sent me.
Stop by the Cutting Cafe blog to see the cards the DT created using the Silhouette set.
Tuesday, August 16, 2011
Pretty Posie
Of all the cards I made for Inky Antics for CHA, this one I think is my favorite. I used image 11048MC Pretty Posey HoneyPOP Clear Set.
I used papers from My Mind's Eye. For the dress, I colored with Tombow's Irojten Colored Pencils. I used a white gel pen to make the dots on the dress.
Here is a peek at the inside:
Tombow's Mono Glue Stick is perfect for adhering the Honeycomb. I used their Stamp Runner Permanent Adhesive for the rest of the card.
We Will Serve
Good Morning! This card uses Biblical Impressions 37003 - We Will Serve image.
Image is colored with markers and papers are from my scrap file.
Image is colored with markers and papers are from my scrap file.
Friday, August 12, 2011
OCL challenge 78 8-12
This week on Our Craft Lounge blog, the challenge is a color one.
For my project I created a 'Back to School Survival Kit' box and used OCL's Build a Bouquet stamp set. You can find a tutorial on the box here and survival kit ideas here, here and here. I just took a mixture of each one and created them how I wanted.
The flowers are paper-pieced with My Mind's Eye paper. The center flower is popped up. I'm thinking now I need to add a button to the center of the flower as well.
I am makinge 3 of these in different colors for some very special ladies. I think I might make a guy one for my son.
BFB Mercy Come Morning
 Krista Miller leaves her mother in the nursing home Alzheimer's unit and drives away. She has no intention of ever returning to visit her mom again. Then comes the phone call 10 years later from the unit's director. He feels she should come back to see something of her mother's that he has. Now Krista must decide if she can truly go back or if she should just continue on with her life.
This is a great story for anyone, but especially for those whose lives have been affected by Alzheimer's in one way or another with loved ones.
It is a story of second chances (not only with her mother, but her first love) and I would recommend this story.
**FTC Disclaimer: I received this book for free from WaterBrook Multnomah Publishing Group for this review
Thursday, August 11, 2011
My card today features another fun HoneyPOP image by Inky Antics. I used 11025 Caterpillar HoneyPOP Clear Set. Papers I used are from My Mind's Eye.
I used Tombow's Mono Adhesive Permanent for all the card elements except the HoneyPOP and I used Mono Glue Stick for it. Images were colored with Tombow's Irojiten Colored Pencils.
Here is a peek at the inside:
I used Tombow's Mono Adhesive Permanent for all the card elements except the HoneyPOP and I used Mono Glue Stick for it. Images were colored with Tombow's Irojiten Colored Pencils.
Wednesday, August 10, 2011
S*C*H*O*O*L Wordbook Album
I have been wanting to make a word book album for a long time. When I first saw them in scrapbooking stores, I didn't want to pay the price, so kept holding off. I was so excited to see Cutting Cafe's A-Z Huge Letter Sheets cutting file. Now I can make any word book I want with this file. Ü While these are somewhat time consuming, they are fun. The nice thing is if I want to make a boy version (which I will) after making the pages the sizes I wanted, they are now done and saved to my computer so I don't have to do that again.
For the whole album I used Echo Park's Country Drive paper line and Tombow's Stamp Runner Permanent adhesive.
Now on to my album:
The idea for this page came from a gal that I met at CHA. Her name is Nana Campana. She showed me this cool album that she had made using Tombow's Fastener Tabs where you can switch the words under a photo. That is what I did on the page below.
Be sure to stop by the Cutting Cafe blog to see all the "School" themed project the rest of the DT created.
Subscribe to:
Comments (Atom)


