Monday, February 4, 2013

14 Days of Valentine's ~ Day 4

I have another "strange" gift I created for Valentine's Day to share with you today...pillowcases. Ü Here is how I came up with the idea...

Benjamin asked me (a long time ago YIKES) if I would make him a Husker pillowcase. I decided it was getting done and since the colors are red/white/black, perfect for the Valentine pkg I will send to him (he's in college). So....if I'm going to make him one, then I'm thinking I should make his girlfriend one. If I'm going to make her one, my nephew who is in his first year of college might like one (esp if it has to do with cartoons Ü) and if I make him one, then I just as well make Aaron one too. Remind you of "If You Give a Mouse a Cookie" story? Ü Only this is "If You Make a Pillowcase for Benjamin..."

So on to the pillowcases. I used this tutorial to create them (Pinterest of course).

The pillowcase that started it all...

I love that I have a "girl" to create for now. It's fun to make girly things. Ü

For Aaron:

and Ryan, my nephew

Creating these was a BIG thing for me. I used to sew a LOT. My grandma taught me to sew when I was 8 and I got my first sewing maching when I was 13. This was the first project I have made in over16 years. I was making a doll that fateful summer as I was pregnant with twins. In August I was in an accident that took their lives and just couldn't make myself sew after that and I had tried for many years to. This was very theraputic for me. DH even asked how long it had been since I sewed (I used to quilt too and am ready to get back to it) and when I said "since the accident", he understood what I meant.
 
I am also linking this up to Country Girl at Home for her Pinned It Made It Monday challenge.
Sunday, February 3, 2013

14 Days of Valentine's ~ Day 3

Welcome to day 3 of my 14 Days of Valentines. This may seem like a bit of a weird gift for Valentine's Day, but I like to give practical gifts as well as fun and or food gifts.

I crocheted these 3 dishcloths using this pattern I found on Pinterest. I followed the instructions to the letter. They are so easy to make and I got almost all 3 done while taking tickets 2 nites at an LVC Basketball game last week. I finished the 3rd one up today (only had 1/2 done).
I'm thinking I might add a small bottle of dish soap and a tag that says "I 'soap' you have a great Valentine's" or something like that. We'll see...I'll post a picture if I do.

Saturday, February 2, 2013

14 Days of Valentines ~ Day 2

Today I am going to share a recipe and a tip that was new to me. I have been making monster cookies for a long time and have always used quick oatmeal. I went to make my cookies and only had 2 cups of quick. I googled to see if I could use old fashioned and was pleasantly surprised that I could! Not only that, but I like them much better. Ü This is a very good thing, because we eat lots of oatmeal, so I always have old fashioned around. Now I'm not sure that I even need to by quick again.

Here is a picture of my Valentine cookies. Some were eaten and the others I put in the freezer to save until Valentine's day. I used an ice cream scoop to make extra large cookies.


Monster Cookies
1 cup butter or margarine, softened
3 cups peanut butter
2 cups granulated sugar
2 1/4 cups brown sugar
6 eggs
1 tablespoon vanilla
4 teaspoons baking soda
2 teaspoons salt
8-9 cups oatmeal
1 - 12 oz pkg chocolate chips
1/2 lb M & M's

Mix in usual cookie order. Bake at 350* for 10-12 minutes.


Friday, February 1, 2013

14 Days of Valentines ~ Day 1

Happy February! Hard to believe that one month of the new year is gone already. I want to share with you 14 projects I have created/am creating for Valentine's Day. Many will be Pinterest inspired.
 
Today's is one that is a Valentine version of a gift bag I made at CHA for Halloween last summer.

 
I used a small white sack from Hobby Lobby and covered the papers with Kaiser Craft designer paper. The images (socks and sentiment) are digital ones from Whimsie Doodles. I colored the image with Tombow Dual Brush Pens. Ribbon from May Arts. Inside are some fun fuzzy socks that are orange and hot pink polka dots.

Tuesday, January 29, 2013

Egg Carton Love

You know how much I love to recycle things if you've been around my blog much. I saw on Pinterest where someone recycled an egg carton and knew I had to give it a try. 6-piece egg cartons are even cuter! (got mine at petchicken.com) AND if you know me at all, you know I like to be a non-traditionalist at times, so rather than decorate a carton for Easter, I decided I wanted to decorate one for Valentine's Day.

I ♥ Fancy Pants' Blissful Blizzard line and yes it is a winter line, but going out of the box, I think the colors are perfect for Valentine's Day as well!

I cut the hearts with my George Cricut cartridge and inked all the edges. Then just started layering using Tombow adhesives. The lace is from My Arts. Oh and the carton is lightly spray painted white. Now all I need are some wrapped candies to fill the inside with.


I am also linking this up to Country Girl at Home for her Pinned It Made It Monday challenge.

Sunday, January 27, 2013

Our Craft Lounge Closing Doors

I just received this info from OCL:


January 2013

It is with great sadness that we write this newsletter to let you know that Our Craft Lounge will be closing our doors.

We will be having an Inventory Blowout Sale starting today, Sunday, January 27th. This will be your last chance to pick up some great deals on some AMAZING stamp sets.

Thanks to our customers and retailers for all of your support through the years!

50% off all stamps, no minimum purchase, does not include taxes or shipping. Shop now at www.ourcraftlounge.com.

Once again, thank you so much for your support!

Sincerely,

The OCL Staff & Creative Team

BFB Echoes by Robin Jones Gunn

Echoes, Glenbrooke Series #3   -     
        By: Robin Jones Gunn
Echoes is book three in the Glenbrook series. After hearing about his sister's broken engagement, Lauren's brother introduces her to the internet. He sets her computer up and shows her how to enter chat rooms. He even goes as far as finding her a "penpal" (KC), who she finds she can be open with over the next year, talking about all her loves, esp Robert and Elizabeth Browning books and poems. She finds herself falling in love with him, but can she risk her heart again if she meets him?

I loved this 3rd book in the series and love that it doesn't have to be read in the series to know what is going on, but stands alone on its own.

I received this book for free from WaterBrook Multnomah Publishing Group for this review.

Tuesday, January 22, 2013

Bluebird Tag

I think my body is finally getting back to normal after the jet lag. Amazing how just a 2 hour time difference can get me out of whack! I have a cute bluebird tag to share today.
 All the pieces were cut with the Cricut. Designer paper from Fancy Pants and Echo Park; ribbon: May Arts; kraft cardstock: Bazzill.

Adhesives used were Tombow's Glue Pen and Mono Adhesive Dots.

Monday, January 21, 2013

Pinned It Made It Monday

After taking last week off since I was at CHA, I am back with a couple more things I have made from my pinned boards on Pinterest. These two recipes I made over Christmas break for Aaron's birthday.

The first is Peanut Butter Chocolate Dessert
Peanut Butter Chocolate Dessert Recipe

He liked it so much, he said I could make it every year for his birthday. 

He has been asking for donuts for his birthday, so I made some, but the picture of mine is just dough dabs (pinch off dough and fry). I did make donuts, but they got eaten up before I remembered I wanted to take a picture of them.

Raised Doughnuts

mine Ü

I am also linking this up to Country Girl at Home for her Pinned It Made It Monday challenge.

Tuesday, January 15, 2013

Cherr-i-o

As you read this, I will be on a plane returning from CHA in Anaheim, CA. I am sure I will have had a great time and will have lots of fun things to share with you in the coming weeks.

Today I have a fun card to share with you using individually wrapped lifesavers.

Designer paper is from Fancy Pants Designs’ Blissful Blizzard line (except for leaves and they were just cut from some scraps I had). I adhered the strips on the bottom of the card with Mono Adhesive Permanent and then placed my lifesavers where I wanted and adhered them with 1/4 of a Power Tab.

With Dual Brush Pen #158-Dark Olive, I drew the stems and then hand cut the leaves. The sentiment was created on my computer.

Monday, January 7, 2013

I am so excited!

I have several projects that are on the Michael's website. I was asked by Tombow if I would design some projects for Michael's and you can see them in these links.

Mini Junior Legal Pad
Floral Card
Mouse Trap
Altered Storage Jar
Home is Where the Heart Is

Pinned It Made It Monday

It is time to get back to Pinned It Made It Monday! I have a yummy chicken recipe to share with you today.
Here is a picture from Pinterest.
I served ours on white cooked rice. I also doubled the sweet and sour sauce.
I am also linking this up to Country Girl at Home for her Pinned It Made It Monday challenge.

Thursday, January 3, 2013

Eucharisteo

My word for 2013 is Eucharisteo yoo-khar-is-teh'-o v.
  1. to be grateful, feel thankful
  2. give thanks
Last year I started reading 1000 Gifts by Ann Voskamp and was challenged to take the Joy Dare this year. She was challenged by a friend to write down 1000 things she was thankful for and it resulted in a book to share with others to do the same thing. If you write down 3 things each day, you will have written down over 1000 things you are thankful for in a year's time. On her blog you can find monthly calendars to print out for prompts if you need them. I may use some of hers and may just write my own.

James 1:2 says "Count it all joy, my brothers, when you meet trials of various kinds". We definitely met all kinds of trials in 2012 and I hope I don't have to go thru all of that in one year again. But as hard as the loss of friends and family, the loss of security and friendships and the loss of faith in others was, it was a year of learning and for that I can give thanks. I hope it has made me a stronger person...stronger in my faith, stronger against those who mean harm and stronger in believing that God will take care of me and my family even though we don't know what the future holds, where we may or may not be living and what jobs we may or may not have.

So to keep track of my 1000+ things I am thankful for, I created this quick and simple journal using some of Ann's free printables found on her website. I also printed this image from Graphic Fairy.

I bought a couple of the books as gifts and made journals for the recipients as well.

These are made with a pocket folder cut in half and then cut down to fit a jr. legal pad.

I am also doing this for this year. This gal has a declutter calendar for 2013. It is my goal to do as many of them as I can (some don't apply) and declutter!

Happy 2013 to you all! There will be more changes this year to my blog that I will share with you later.

Tuesday, January 1, 2013

Snow Much Fun

Happy New Year! It is freezing cold outside and snow still on the ground with forecast of more. Today I have a sweet treat to share with you.


This fun snowman is from Inky Antics. I colored it up with Irojiten Color Dictionary Pencils. The yummy designer paper is new from Fancy Pants Designs’ Blissful Blizzard line. I used Power Bond Adhesive to adhere the papers. Add some almond bark dipped pretzels to fill the container, and you have a fun little winter treat to give to someone special.

I hope you all have a great year!

Monday, December 17, 2012

Pin-spired Week 3


Week 3 for Kendra's Pin-spired challenges. Today I have another project and recipe to share with you for this week's Pin-spired challenge. My friend Kendra invited me and others to join her in her "Pin-Spired" Christmas Celebration this month. Kendra is posting something every day from the 1st-21st of December on her blog. Be sure to stop by her blog every day to be inspired.
I was inspired by this post on Pinterest for Christmas Planners. I made some last year and decided to make more again this year.
 
I decided to make one using a pocket folder. Part of the work (the pockets) is already done for you! Here is one I created using an Inky Antics stamp image and lots of Tombow adhesive.
 
 The inside printables are from Cutting Cafe. The receipts item in the last pocket is an envelope I adhered flap closed, covered with designer papers, and then made a flap on one end.
 
I am also linking this up to Country Girl at Home for her Pinned It Made It Monday challenge.
 

Friday, December 14, 2012

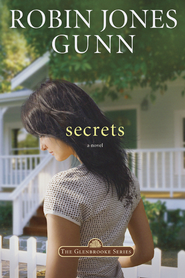
BFB Secrets by Robin Jones Gunn

Another wonderful book from Waterbrook Multnomah Publishing!

This one is the first in a series in her Glenbrooke Series and I've seriously got to read the others!
Secrets, Glenbrooke Series #1   -     
        By: Robin Jones Gunn

The thing I loved about this book is that it flows so nice and you just want to keep turning the pages. In Secrets Jessica is beginning a new life in a new town to start a new job. She meets a handsome firefighter and a jealous new boss who both want to know her secret. I loved this book. You don't learIn Secrets Jessica is beginning a new life in a new town to start a new job. She meets a handsome firefighter and a jealous new boss who both want to know her secret. I loved this book. You don't learn of the secret til near the end and has enough twists and turns to keep you reading til the end! This is the first in a series of 8 and I would definitely be interested in reading the others.n of the secret til near the end and has enough twists and turns to keep you reading til the end!

I received this book for free from WaterBrook Multnomah Publishing Group for this review.

Tuesday, December 11, 2012

The Tombow design team received some lovely goodies from Maya Road to share with you this week. It's been quite awhile since I've posted some cards and I loved the butterfly rubber stamps I received from them.
This card uses Mono Adhesive Permanent, scallop punch, black & aqua ink and designer paper.

For my second card I stamped the outline butterly in charcoal gray and then used Dual Brush Pens to color the "soar" butterfly image. This is less expensive than having several ink pads in different colors.
They are both clean and simple cards and perfect for mailing...no bumps and lumps. Ü I know it is early to be thinking of graduation, but I think the soar theme is perfect for this occasion and I will use these for such.
 
Be sure to stop by the Maya Road Blog to be inspired by their design team.

Monday, December 10, 2012

Pin-spired Week 2


I have another project and recipe to share with you for this week's Pin-spired challenge. My friend Kendra invited me and others to join her in her "Pin-Spired" Christmas Celebration this month. Kendra is posting something every day from the 1st-21st of December on her blog. Be sure to stop by her blog every day to be inspired.

I created these fun snowman tags from this Pinterest post.
Pinned Image
 
I made my tags by cutting 2" circles of kraft cardstock (I think paper grocery sacks would work too) and adhering 2 of them together to make them stronger. Then I just drybrushed some white paint on one side. After that dried I drew in the eyes and nose with markers. I didn't have any jute, so just used red crochet thread. I left the ends long enough to tie onto a gift bag. The back is plain so I can write "to and from".
 
Here is my version of the snowman tags.
 
Now for a super yummy treat! This  Mile High Peanut Butter Pie is the yummiest pie every! It is super easy to make and very light.
 
Here is mine....so good that I need to make it again soon. Just a coupld of differences in mine...I already had a graham cracker crust, so used that instead of the vanilla wafer one the recipe called for and the recipe said to use BAKER'S Semi-Sweet Chocolate to melt for the top, I didn't have any, so just used melted dark chocolate chips.
Pinned Image
 
Here are pictures of mine:
 
here is what it looks like sliced:
 tip: for drizzling on top I added my chips and peanut butter into plastic bags, melted as needed and then snipped a tiny bit off of one corner. Then just squeeze and drizzle over the top. Ü


I am also linking this up to Country Girl at Home for her Pinned It Made It Monday challenge.